This post explains how to display attachments of test results, published within the AzureDevOps Server.
Intention && Background
As being responsible (among others) of the Test Automation of a Software Application, my team asked me to implement an improvement within our proprietary self-written testing tool. The testing tool generates specific files, which indicate hints about the reason of failure of a test. For getting those files, it was necessary to connect to the specific server - at which the test run was conducted - or to download the files from a share. We run the testing tool with dedicated tasks of the Azure DevOps Server and after conducting all tests it generates a final xml file, which contains the necessary NUnit format for displaying the test results properly. So, the idea arised to add the files as attachments to the failed tests - without need to log on to the server for analyzing the files.
Introduction
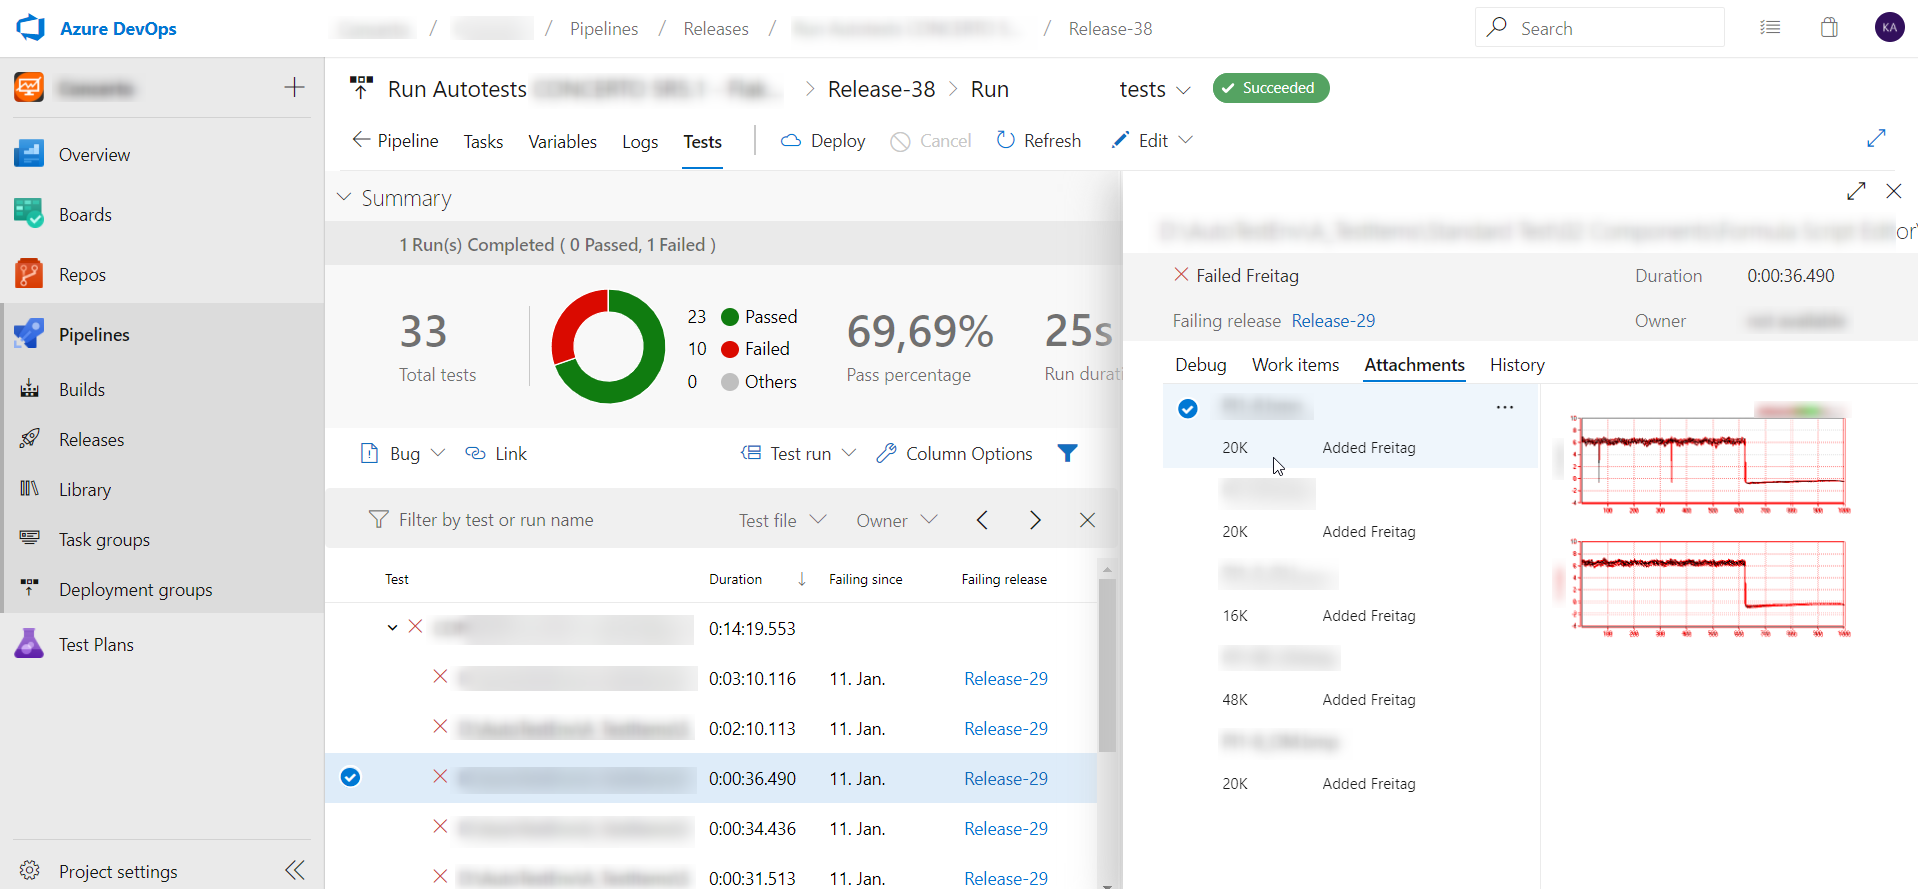
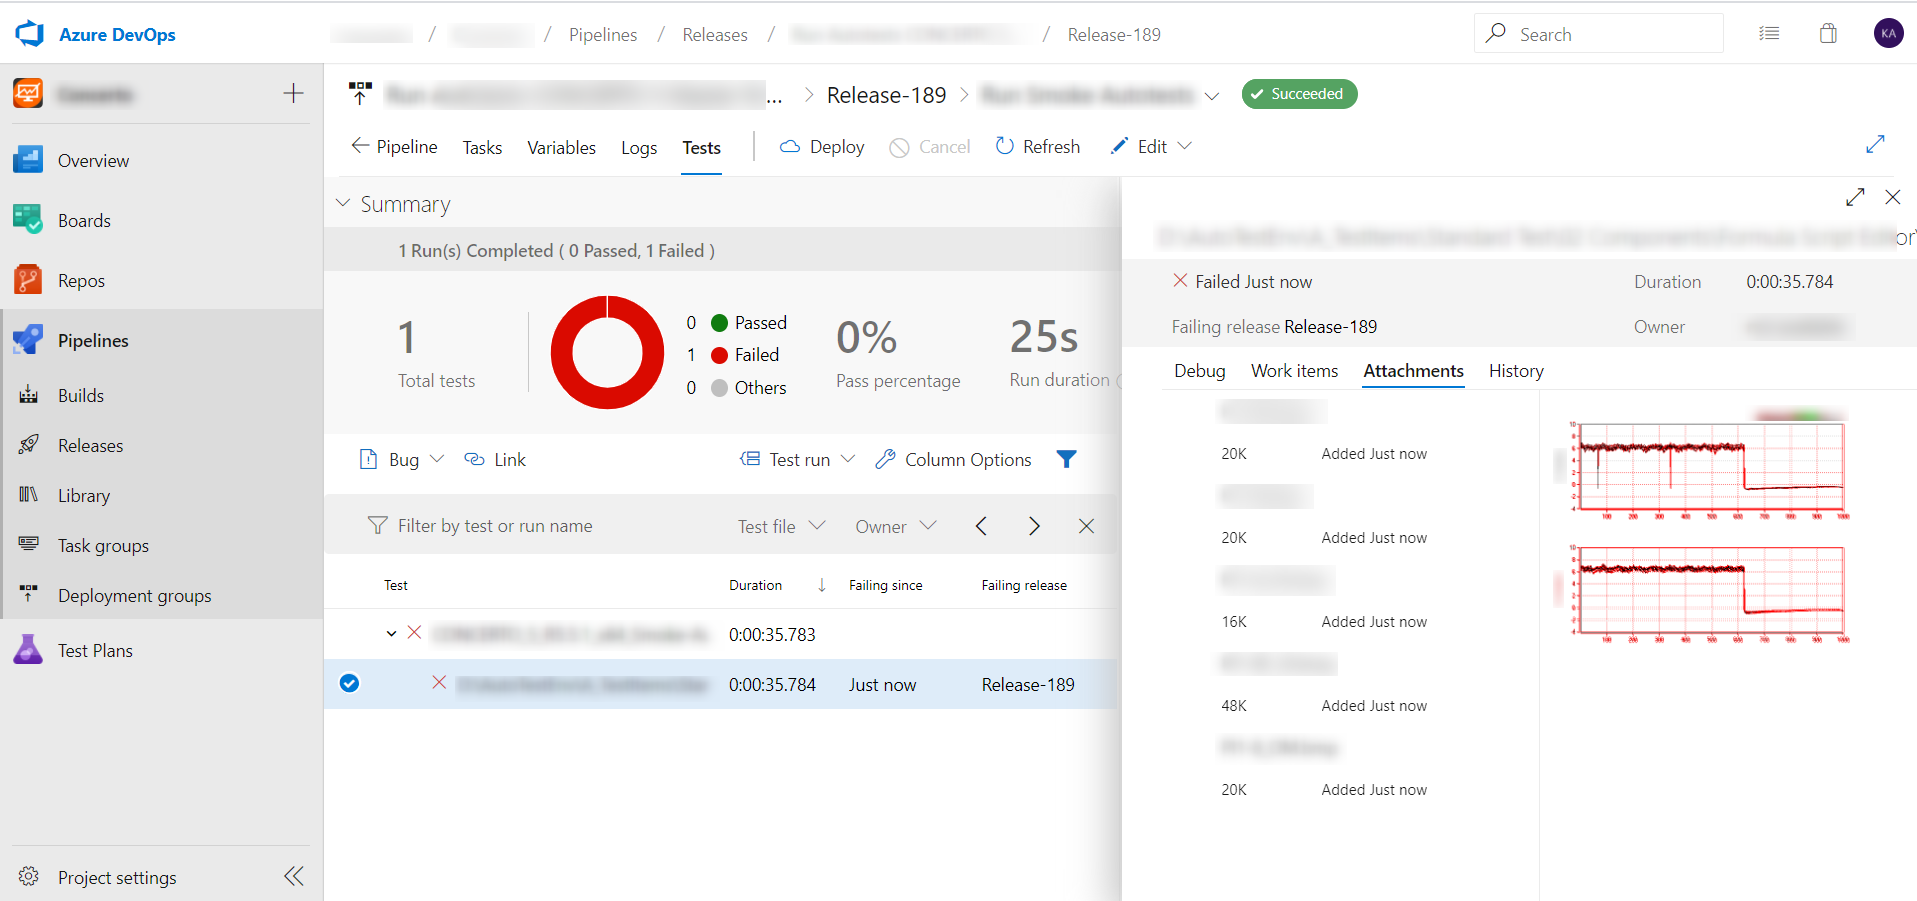
The picture shown below serves as an example about the achievement. It displays the results of a test run - conducted with an AzureDevOps Release Pipeline. Each failed test offers attachments, which can be accessed by choosing the Attachments tab of the corresponding test. Within this post, I’d like to guide through the necessary steps.
1. Structure of the NUnit XML File
At first, the necessary structure of the xml file, which will be used as final file to be published by the Azure DevOps Server, has to be explained. A test, which should include an attachment (e.g.: a text file or a picture), has to have an attachment tag. Inside the attachment tag, the path to the file - which should serve as the attachment - has to be entered within the filePath tag.
<attachment>
<filePath>"C:\testresults\attachment_test_01.jpg"</filePath>
</attachment>
The attachment tag has to be embedded within an attachments tag. Of course it is possible to add further attachments.
<attachments>
<attachment>
<filePath>"C:\testresults\attachment_test_01.jpg"</filePath>
</attachment>
<attachment>
<filePath>"C:\testresults\attachment_test_02.jpg"</filePath>
</attachment>
</attachments>
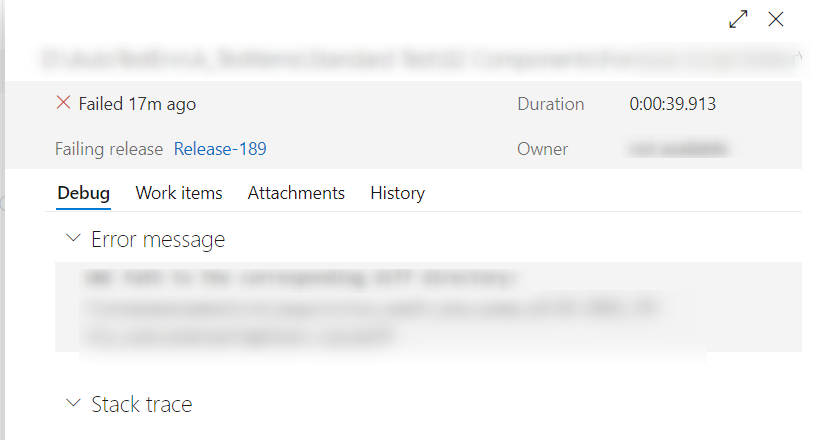
It is also possible to add a specific Error Message at the Debug tag:
<message><![CDATA["Message you would like to show at the 'Debug' tab"]]></message>
which results to the picture shown below (instead of the blurred field ;).
The final xml file in NUnit format, consisting of the test results looks like e.g.:
 <?xml version="1.0" encoding="UTF-8" standalone="no"?>
<test-run id="0" engine-version="3.11.1.0" clr-version="4.0.30319.42000" testcasecount="1" runstate ="Runnable" result="<Result: e.g. 'Passed'>" total="1" passed="0" failed="1" warnings ="0" inconclusive="0" skipped="0" asserts="0" start-time="<TimeStamp of Start Time>" end-time="<TimeStamp of End Time>" duration="<Duration e.g.: '40'>">
<test-suite type="Assembly" id="0-1001" name="<Some Run>" fullname="<Some Name>" testcasecount="1" runstate="Runnable" result="Passed" total="1" passed ="0" failed ="1" warnings="0" inconclusive="0" skipped="0" asserts ="0" start-time="<TimeStamp of Start Time>" end-time="<TimeStamp of End Time>" duration="<Duration e.g.: '40'>>">
<test-suite type="TestSuite" id="0-1002" name="<Some Run TestSuite>" fullname="<Some Name> TestSuite" testcasecount="1" runstate="Runnable" result="Passed" total="1" passed ="0" failed ="1" warnings="0" inconclusive="0" skipped="0" asserts ="0" start-time="<TimeStamp of Start Time e.g.: '2020-09-15 02:00:53Z'>" end-time="<TimeStamp of End Time>" duration="<Duration e.g.: '40'>">
<test-case id="<Sample ID>" name="<Name of the test>" fullname="<Full name of the test" methodname="<Method>" runstate="Runnable" result="Failed" asserts="0" duration ="<Duration in proper format>" classname="<Name of the class>">
<failure>
<message><![CDATA["Message you would like to show at the 'Debug' tab"]]></message>
</failure>
<attachments>
<attachment>
<filePath>"C:\testresults\attachment_test_01.jpg"</filePath>
</attachment>
<attachment>
<filePath>"C:\testresults\attachment_test_02.jpg"</filePath>
</attachment>
<attachment>
<filePath>"C:\testresults\attachment_test_03.jpg"</filePath>
</attachment>
<attachment>
<filePath>"C:\testresults\attachment_test_04.jpg"</filePath>
</attachment>
<attachment>
<filePath>"C:\testresults\attachment_test_05.jpg"</filePath>
</attachment>
</attachments>
</test-case>
</test-suite>
</test-suite>
</test-run>
This would result to following view within the AzureDevOps Server: the five different jpg-files, included within the attachments tag are displayed as list after choosing the corresponding test. Performing a click at the desired picture will display it within the view.
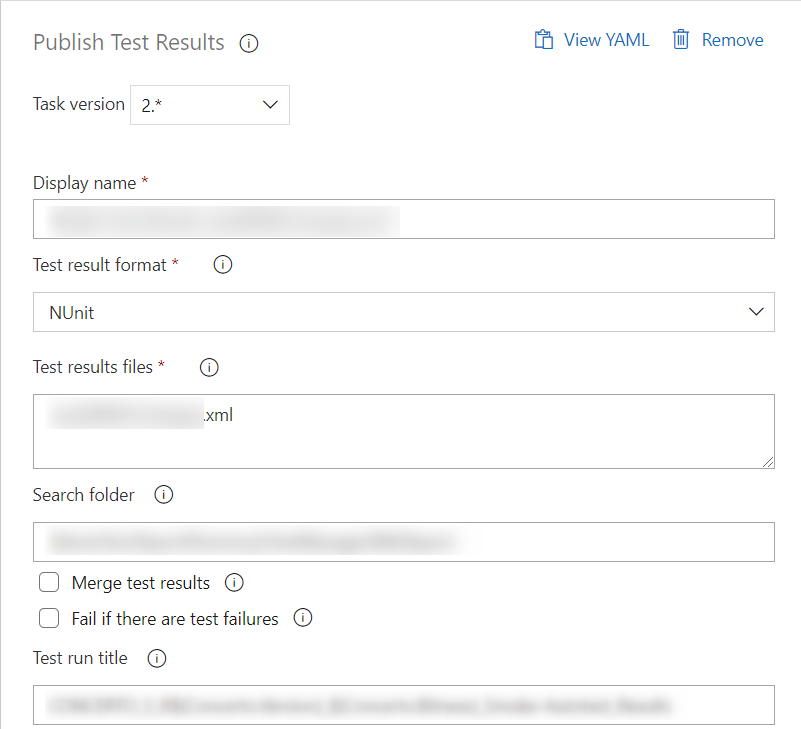
2. Settings of the AzureDevOps Task
The result shown above was achieved with the “Publish Test Results” task, which is in my case, the last task of a specific stage of an Azure DevOps Release-Pipeline.

It is recommended to always use the latest available task version, e.g. the version 2. Important fields are:
- Test result format: NUnit
- Test result files: Insert the name of the generated xml file, which contains the test results in proper NUnit format
- Search folder: Path to the directory, which contains the xml file
3. Restrictions
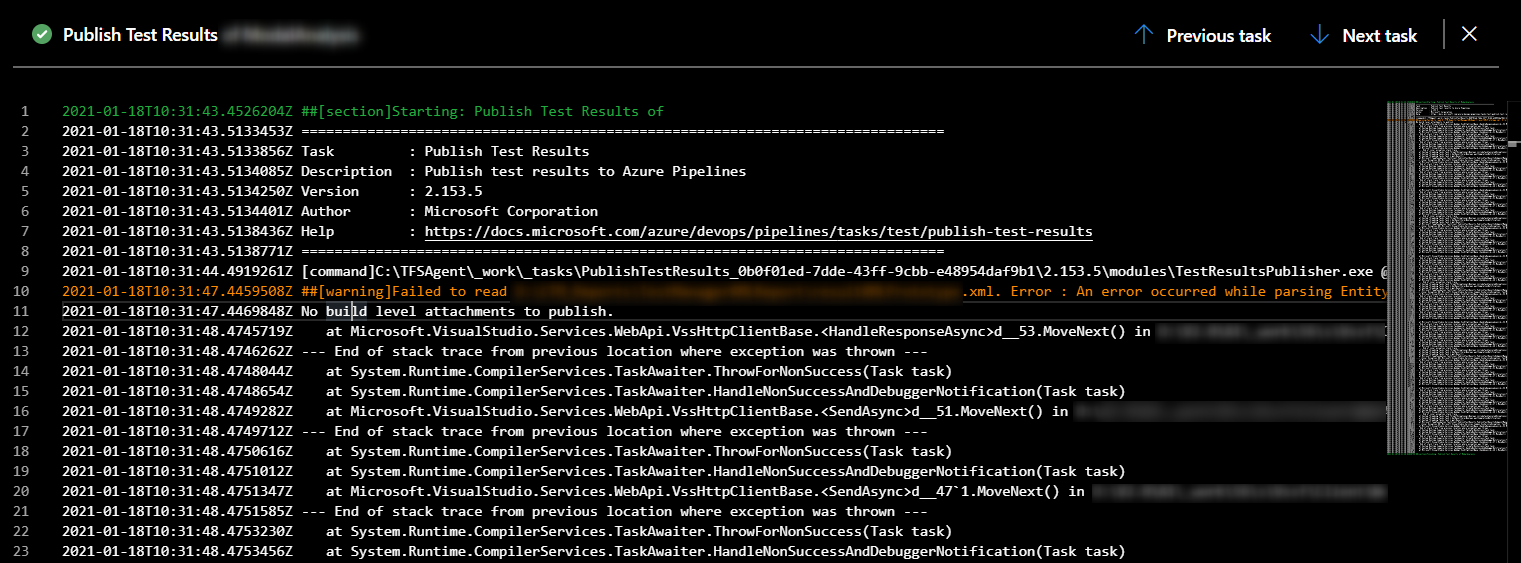
Be aware that the character “&” is not supported in Nunit 3.7.0 according to the test parameter. There is need to convert ‘&’. The issue is well documented at GitHub, see Char ‘&’ not supported in test parameters in Nunit 3.7.0. If you do not convert the character, you’ll get a result within the Azure DevOps Server similar like shown in the picture below.