This post explains how to set up a simple pipeline within Azure DevOps Server (2019) for building a Dockerfile
Introduction
CI/CD should of course applied to Dockerfiles too. Changes of a Dockerfile must be versioned within a version control system and result to an automated build, which will be further pushed to a registry. Within this post, the creation of a simple pipeline (see picture below) with the Azure DevOps Server is explained, which is capable of building a Dockerfile and setting a proper name, respectively tag for the resulting Docker Image.
1. Create a Build Pipeline and define the Source
At first, create a new Build Pipeline within Azure DevOps Server, provide a name for the pipeline and select the source of the Dockerfile. In my example, the Dockerfile which I want to build, is versioned within an Azure Git Repository.

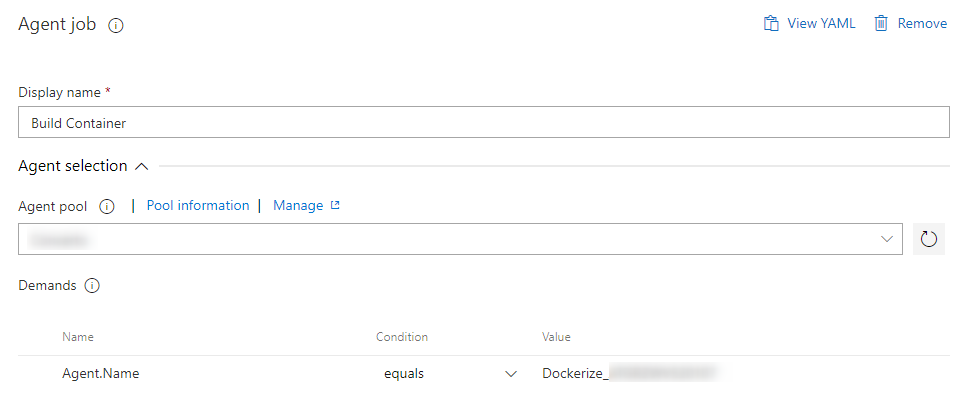
2. Set proper Agent Pool and Demands for the Agent Job
When triggering an Agent Job for the pipeline, ensure that the job runs on an Agent, which is capable of building the Dockerfile. Therefore set the dedicated Agent Pool and proper Demands. In this example I determine a specific Agent by providing the Agent Name (see Capabilities tab of the Agent within the Agent Pool) as a Demand.
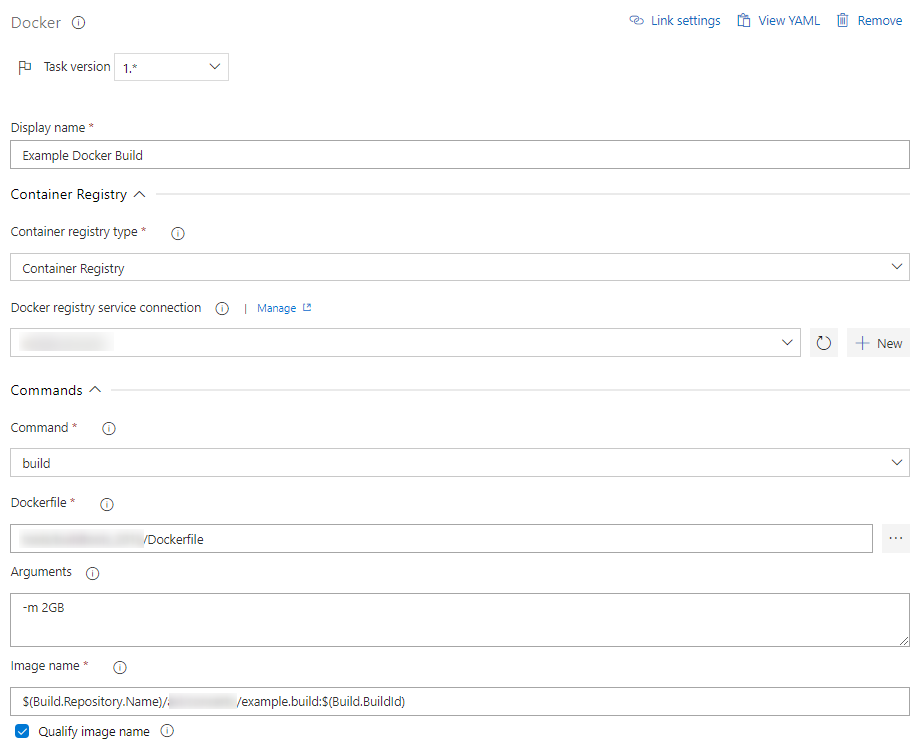
3. Add Docker Task and provide proper Settings
The task Docker is necessary for conducting proper Docker commands - in that case we need the build command. So, add the Docker task to the pipeline.

In this example, I use the task version 1 of the Docker task. Furthermore, I’d like to use a Container Registry as Container Registry type, which I’ve added by setting up a proper Service-Connection. At Docker registry service connection choose your dedicated registry. In the context of this post, I just use the command build without a push to the registry. The field Dockerfile requires the path to the Dockerfile, which is located within the Azure Git Repository - you can navigate to the file by clicking at the button on the right. You can provide further arguments, which you may need to build your Dockefile, by entering them at Arguments. Be sure to enter it in the correct way as seen in the example, otherwise the logs will report that the arguments can not be consumed. At Image name simply provide the desired name. A proper approach to distinguish between different builds would be to simply use the build id as tag. The full image name therefore is a concatenation of the name and a proper tag.
Do not forget to set a proper value for timeoutInMinutes, be aware that pulling the used base image of your Dockerfile may take some time for the first run.
4. Run the Agent Job and verify Image ID
Trigger a new Release of the Build Pipeline, the result should like similar as seen in the picture below:
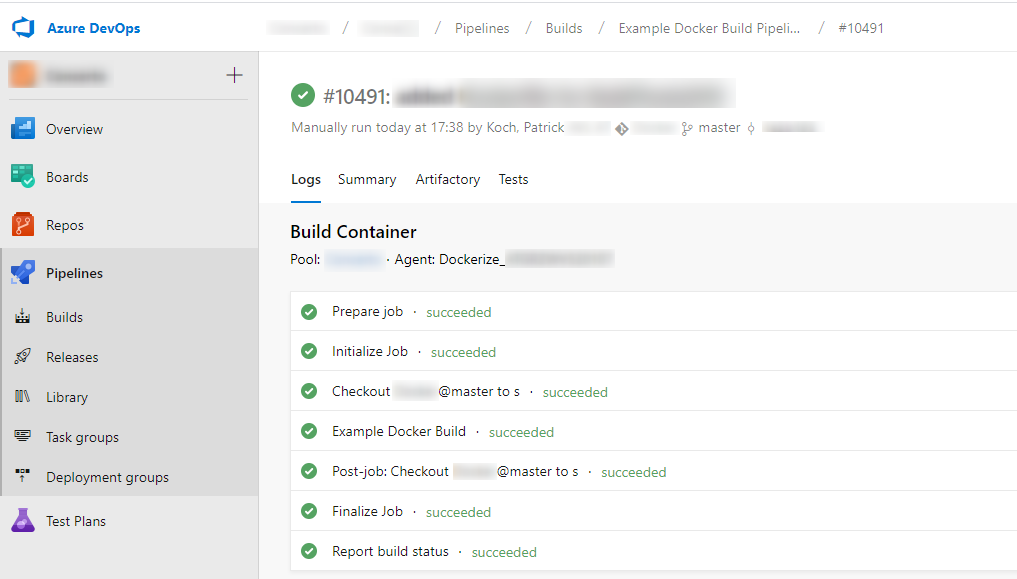
The build id - in that case 10491 - is now used as tag for the resulting Docker Image.
Within the logs, you should observe a log message like e.g.:
Successfully built e025d97c13a6
Successfully tagged ***/***/***/***/example.build:10491
You can verify it at the build agent, just open e.g. a PowerShell Terminal at the Agent, enter docker images and verify that this image with this specific Image ID exists.

YAML Code Snippet
The YAML snippet for this example can be seen below:
steps:
- task: Docker@1
  displayName: 'Example Docker Build'
  inputs:
    containerregistrytype: 'Container Registry'
    dockerRegistryEndpoint: <your docker registry>
    command: build
    dockerFile: '<your path to the dockerfile>/Dockerfile'
    arguments: '<build arguments you need>'
    imageName: '<name of the image>:<including a tag>'
  timeoutInMinutes: 20