The intention of this post is to explain how to deploy a Windows Container Workload at Azure Kubernetes Service

1. Introduction
This post shows how to deploy a Windows Container Workload at the Azure Kubernetes Service. The corresponding Container Image is stored and managed by an Azure Container Registry. By adding a the mentioned Workload with YAML, respectively by entering kubectl commands, the deployment will be conducted. This leads to a running Windows Container, hosted by the Azure Kubernetes Service (AKS). Of course, deploying and hosting Linux Container is more common, therefore this approach might be interesting ;).
1.1 What is “AKS” - Azure Kubernetes Service?
The Azure Kubernetes Service is capable of (among others) deploying and hosting your Container (Windows or Linux) - in case of the AKS, all related services are operated within the Azure Cloud. The main advantage IMHO is that it’s a managed service. You don’t have to care about dependend services, which have to be compatible to your chosen Kubernetes version. Furthermore, as it is integrated within the Azure of Microsoft, you can consume it in a direct way as a service of the Azure Portal. An AKS instance is set up rather fast, by simply following the different steps in the Azure Portal. Provisioning and maintaining your own hardware to establish a Kubernetes Service on Premise, won’t be necessary in that case. It depends whether it’s too much overhead according to your needs or whether other reasons exists, that you’d like to operate the services on your own hardware and not within the Cloud.
An alternative to Azure Kubernetes Service would be (among others) Azure Red Hat OpenShift. Please be aware of current restrictions with regard to Windows Container - therefore see also the section before the conclusion.
References:
Microsoft - Azure Kubernetes Service (AKS)
1.2 Example Windows Container serving as Example for being deployed and hosted at the AKS
For this post, I’m using a simple, self-made Windows Container as example for getting deployed and running at the Azure Kubernetes Service. The Dockerfile of the corresponding mentioned Example Container can be seen below (see code snippet). The Base Image is a Windows-Server-Core Image. At runtime the Container tries to reach my Webside, which is implemented within a Powershell script “Start.ps1” and terminates afterwards.
FROM mcr.microsoft.com/dotnet/framework/runtime:4.8-windowsservercore-ltsc2019

WORKDIR "C:/Scripts"

ADD "Scripts/Start.ps1" "C:/Scripts"

ENTRYPOINT powershell -File Start.ps1
All related files can be downloaded from GitHub: https://github.com/patkoch/blog-files/tree/master/post6
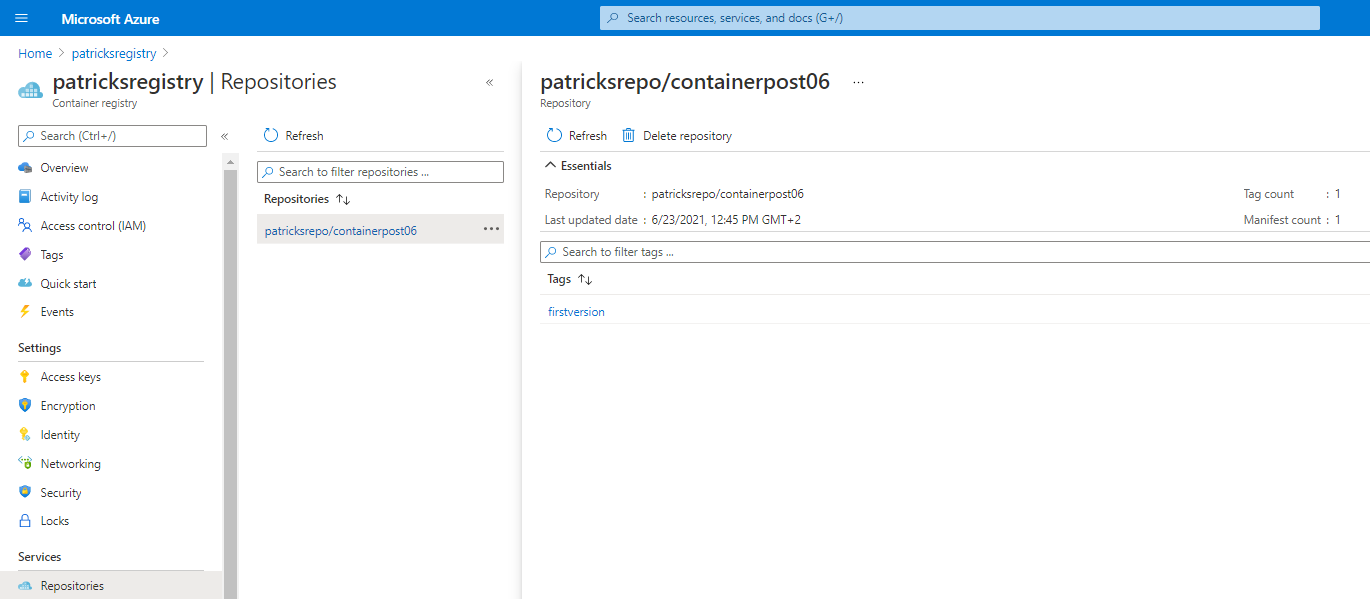
The related Container Image (tagged to “firstVersion”) is already available and managed at an Azure Container Registry named “patricksregistry” (see picture below). Pushing Container Images to an Azure Container Registry was already a topic in a previous post - for more details see:
https://www.patrickkoch.dev/posts/post_06/
2. The Azure Kubernetes Service
Before going to the details about the deployment of the Workload, I’d like to roughly describe the Azure Kubernetes Service, which I’m using. This AKS instance was set up by using the Azure Portal, it includes the Kubernetes version 1.20.5 and contains two Node Pools…
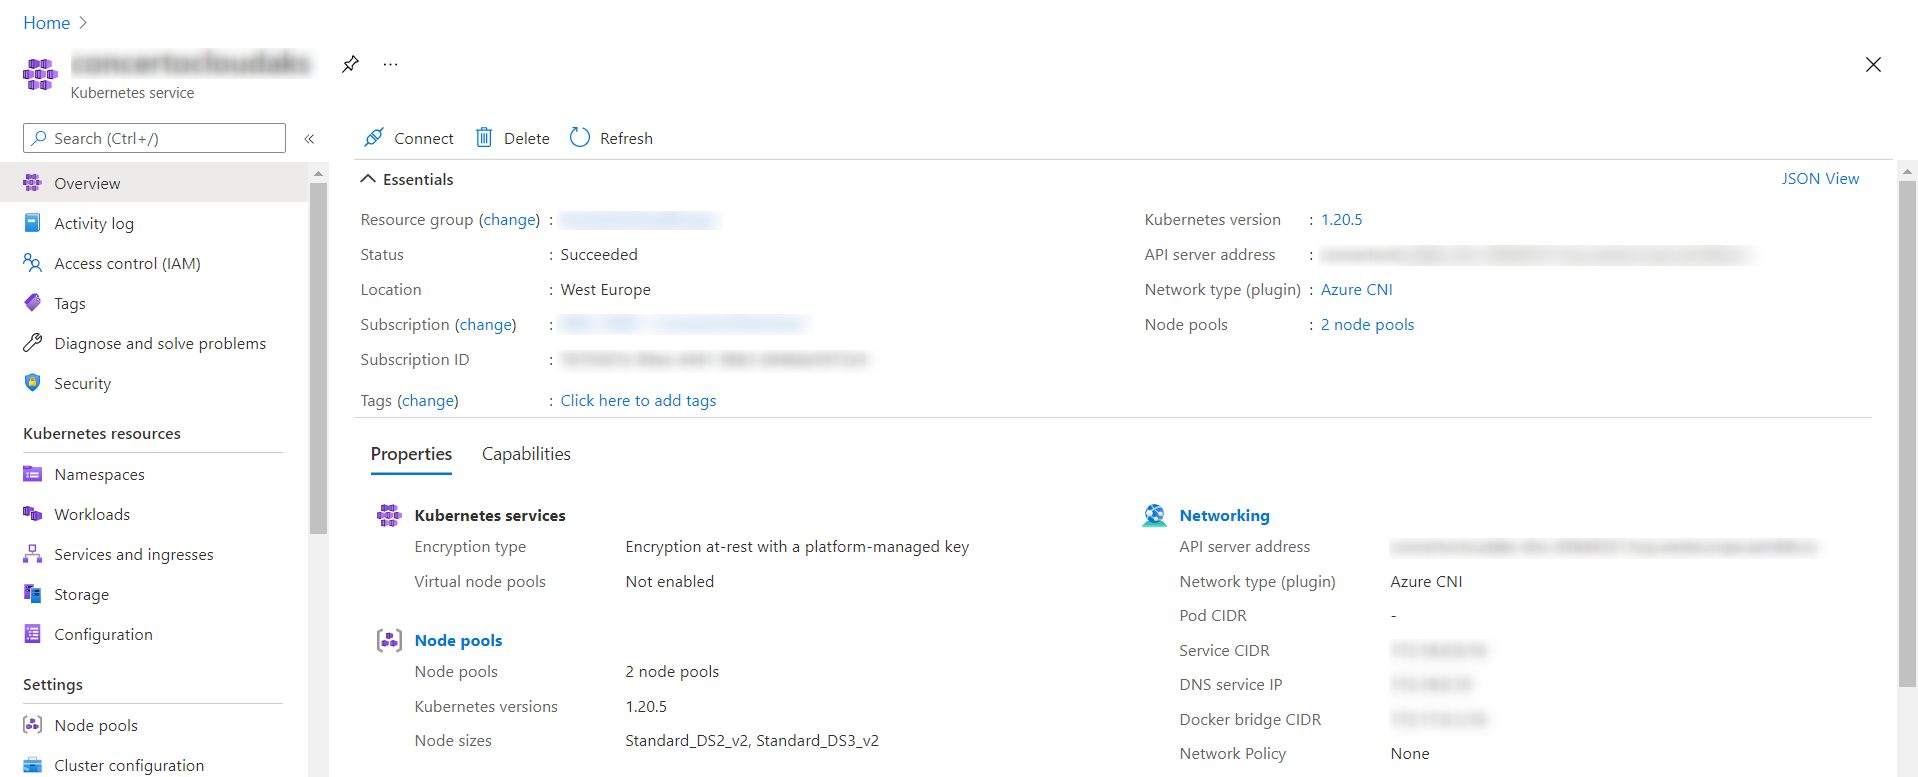
… a Linux related Node Pool and of course for running the Windows Container - a Node Pool consisting of Windows Nodes.

The Windows Node Pool, named “cwpool”, contains three Nodes:

For running one single Job, related to the mentioned Windows Container, it is more than sufficient ;)
3. Deploying the Windows Container Workload
The goal is to establish a running instance of the mentioned Container Image, which is stored at the Container Registry named “patricksregistry”. I’ve conducted the deployment in two different ways:
- Deploying the Workload by using the Azure Portal
- Deploying the Workload by using Powershell and Kubectl
Both ways are described in the following subsections.
3.1 Deploying the Workload by using the Azure Portal
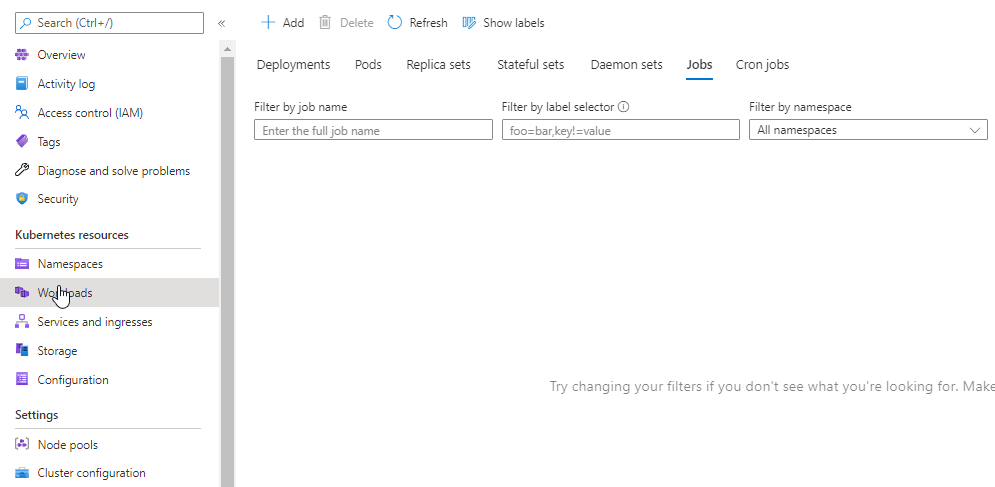
The first option is done within the Azure Portal. The picture below shows the AKS with an empty list of available Jobs. It’s the starting point, so, no Job was conducted, respectively completed.
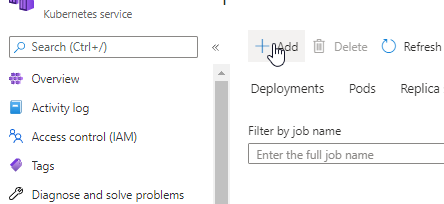
For conducting the deployment of the Workload, choose at first the “Add” button:
Afterwards, I’ve to provide the corresponding YAML code, which defines the Workload:
apiVersion: batch/v1
kind: Job
metadata:
  name: patrickscontainer
spec:
  template:
    spec:
      containers:
      - name: patrickscontainer
        image: patricksregistry.azurecr.io/patricksrepo/containerpost06:firstversion
      nodeSelector:
        kubernetes.io/os: windows
      restartPolicy: Never
  backoffLimit: 4
Within this YAML code, I’m going to define the name of the Container to “patrickscontainer”. Of course I’ve to provide the Container Image, refering to the Azure Container Registry. Important to mention is the “nodeSelector”: I’ve set the value of “kubernetes.io/os” to “windows” to make the AKS clear that it’s about a Windows Container. Imagine this part would be missing - it might happen in my case, that the AKS tries to deploy the Workload at a Linux Node or vice versa - which of course won’t work. Anyway, it would be a good idea to provide this information.
After inserting it, it looks like as in the picture below:
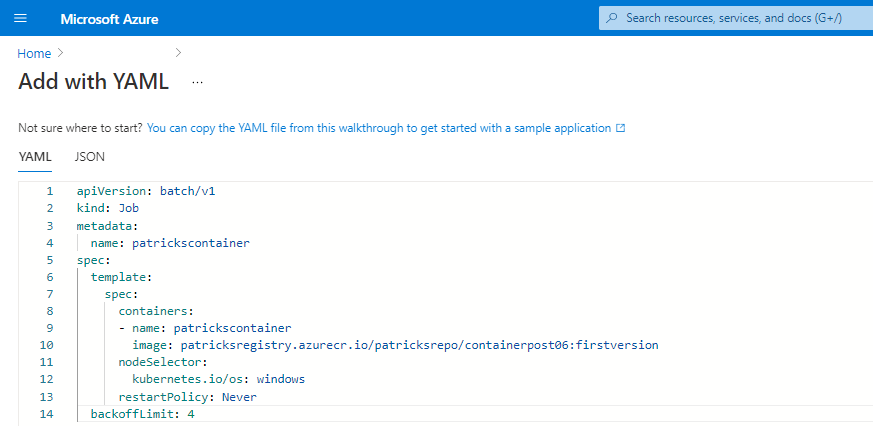
Nice feature: the YAML code is getting immediately verified, whether it’s valid. In case of an error, it is getting reported to you. In my case, I’m going to deploy a Workload of the type “Job”, for further information to this specific Workload type, please consider the link at the end of this subsection, refering to the official documentation.
After providing a valid YAML code, the Workload will be deployed…
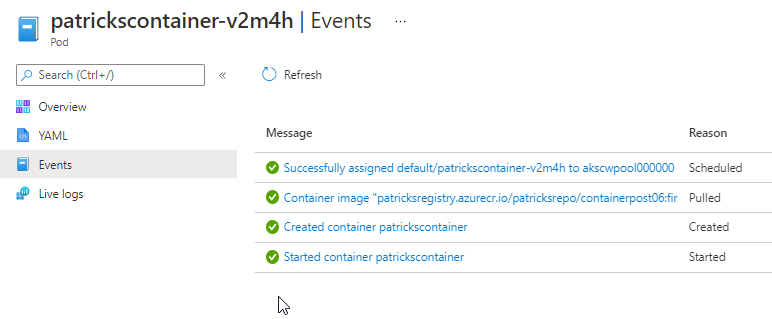
…and finally “patrickscontainer” is running at the AKS:

Now the Container runs properly and can of course be accessed too. Observing the logs and the termination of the Container will be explained within the next section.
References:
Kubernetes.io - Workloads: Job
3.2 Deploying the Workload by using Powershell and kubectl
A different way of deploying the Windows Container Workload would be by using the dedicated kubectl command.
Install kubectl
For getting kubectl, please consider the link below refering to the official documentation.
Kubernetes.io - Install Kubectl
Deploying the Windows Container Workload with kubectl
The deployment will be conducted with following command:
kubectl apply -f aks-workload-container-post-06.yml
For further information regarding to the usage of kubectl, please consider the link below at the end of this subsection.
“aks-workload-container-post-06.yml” consists of the YAML code - which can be seen in the snippet, described in the previous section. So instead of copying the YAML code into the mandatory field within the Azure Portal, I’m using the already prepared YAML file with the same content as argument to a kubectl command. After conducting the command, the Job appears and is getting the status “Running” - which can be seen at the animation below (open the picture within a new tab or reload to start from the beginning):
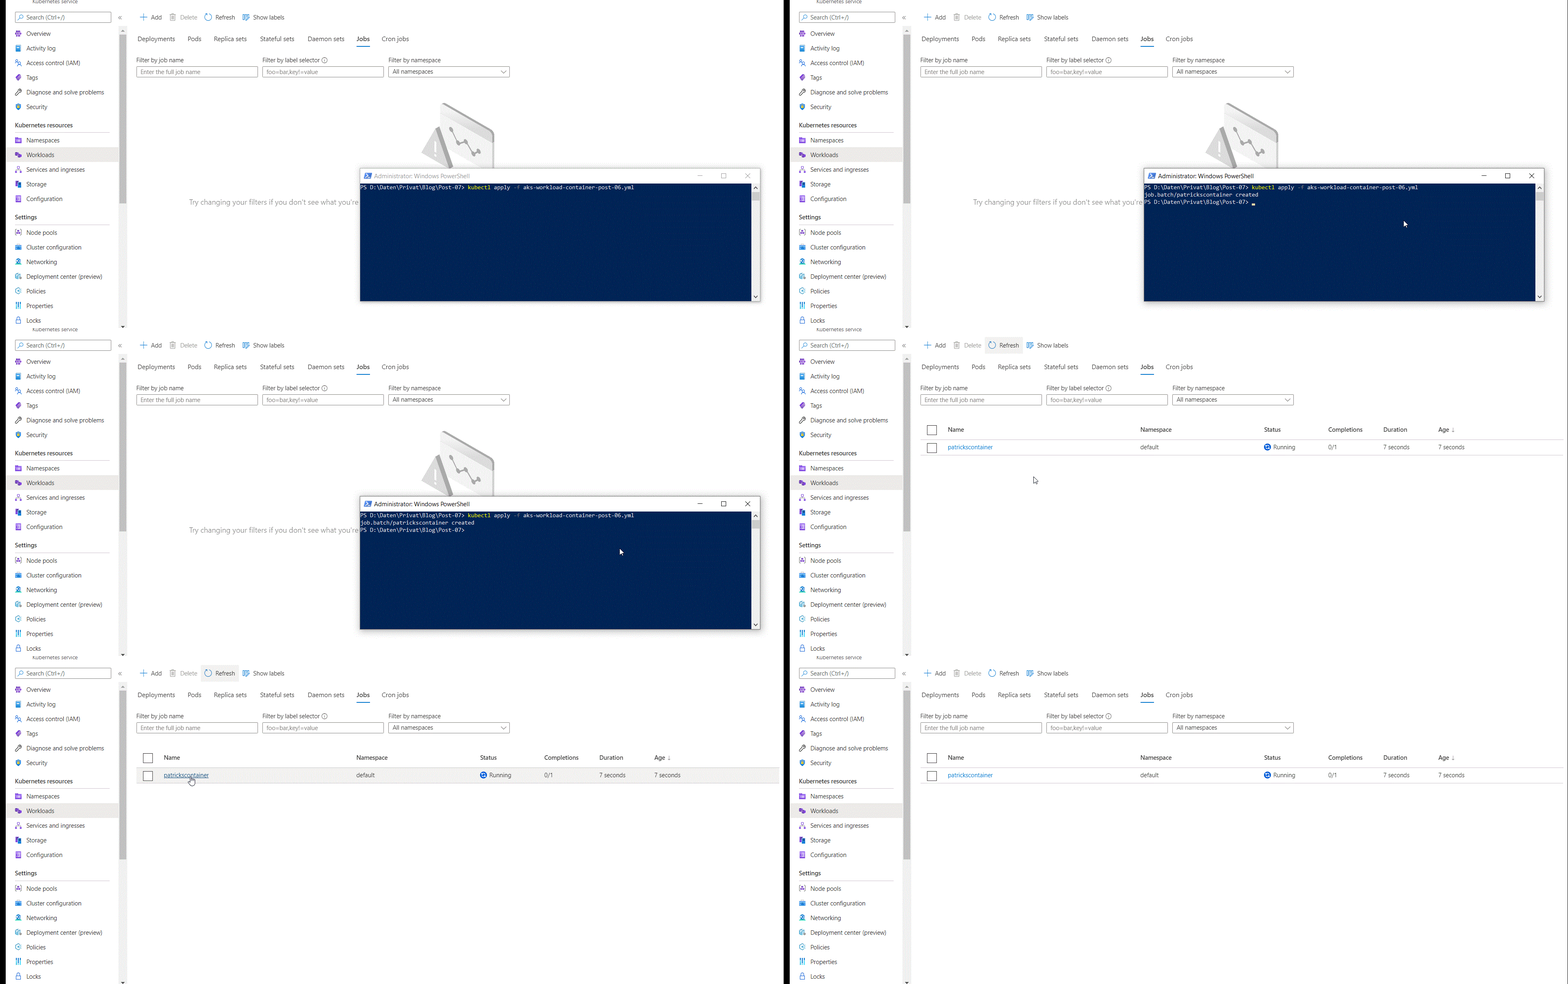
During runtime of the Container, it is possible to see the current logs, as seen below:

Finally, the Job gets the state “Completed”:

References:
Kubernetes.io - Kubectl Cheat Sheet
4. Windows Container Workload Deployment Restrictions for the Azure Cloud
During conducting several implementations, I’ve used the AKS platform as well as OpenShift from Red Hat. Within this section, I’d like to summarize my experiences according to the Windows Container Workload deployment with regard to those services.
OpenShift
If you’d like to use OpenShift, operated within the Azure Cloud - Azure Red Hat OpenShift, then unfortunately you can not use Windows Container Workloads yet.
Azure Red Hat OpenShift (ARO) vs. Red Hat OpenShift
Please don’t mix up Azure Red Hat OpenShift (ARO) and Red Hat OpenShift! The OpenShift platform of RedHat which is operated within the Azure Cloud - so it is about Azure Red Hat OpenShift (ARO) does NOT (yet) support Windows Container in contrast to Red Hat OpenShift.
So, in short: as Windows Container support is possible with Red Hat OpenShift (announced in December 2020, see link below), it is NOT possible with ARO.
Red Hat announcing Windows Container Support (GA) for OpenShift: announcing-general-availability-for-windows-container-workloads-in-openshift-4.6
It’s already planned, that Windows Container support is available for ARO - see the Backlog items at the Azure Red Hat OpenShift Roadmap (visited at the 29th of July, 2021) - but it’s still not in progress. https://github.com/Azure/OpenShift/projects/1#card-54359229
Azure Kubernetes Service
Azure Kubernetes Service supports Windows Container (which could be already proven while reading the post ;)), it was among others announced in April 2020, see link below:
Windows Container support in AKS
5. Conclusion
Deploying Windows Container Workloads at Azure Kubernetes Service works very well. Either you conduct the deployment in a direct way within the Azure Portal or your’re using the specific kubectl command. An AKS instance is set up quickly and if you equipe the AKS with sufficient ressources with regard to the Node Pool, then you won’t be dissapointed according to the runtime of your Container.
I’ve to also make a critical comment regarding to the Logs: I could observe the Logs during runtime of the Container as expected, but after the termination of the Container I’ve failed to get them. I’ve also recognized a small issue regarding to error messages: once I’ve tried - unintentionally of course - to deploy a Linux Container at a Windows Node - of course this won’t work - but the resulting error message wasn’t that meaningful to imply that.
In general, using AKS for your Windows Container Workloads seem to be a good choice and it was fun to work with!
References
Red Hat Blog: Windows Container Support for OpenShift
Azure Red Hat OpenShift Roadmap
Microsoft - Azure Kubernetes Service (AKS)
Windows Container support in AKS