The intention of this post is to explain how to create an Azure DevOps Build Pipeline with an integrated Checkout from Harvest
1. Introduction
A few weeks ago, my team leader asked me to recover the build automation and the corresponding build agent of one of our old versions of our software application. This old version has to be maintained for an additional year - there is no further development planned, so just one year to go according to the maintenance . The operating system of the build machine was still Windows 7 and the build procedure consists of triggering PERL and Batch scripts in a manual way, which are capable of doing the checkout of the source code from Harvest and building the corresponding solutions. Our current build automation is based on the Azure DevOps Server, getting the source from Git and we decided that a transition of our older versions to Azure DevOps won’t be necessary, as they are going to expire soon.
But now, we got the task to save the old build automation by transfering it to a Windows 10 Agent. The first thought was, that we don’t would like to invest much effort, as it is not mandatory to keep this build automation alive for a long time…but…I really like to build all the stuff I need with the Azure DevOps Server. Therfore, the question arised: How could I set up an Azure DevOps Build Pipeline, which source is located at Harvest.
So, in this post, I’d like to show you the answer of this question.
2. Harvest as Source of the Code
I’m using Git as Version Control System, I didn’t know Harvest before. My colleagues, who already gained much more experience in software development than myself used Harvest for many years. I’ve started my journey with the “CA Harvest Software Change Manager” (that’s the official name) last week, trying the get our code checked out.
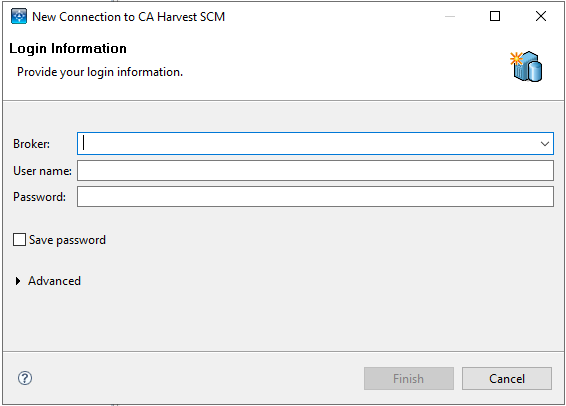
At first, I’ve had to login, therfore I needed to provide the credentials for the Broker, the user name and of course of the password:
After that, the Workbench appears. The source code files can be found in the left frame, after expanding the folder structure of the “Explorer” tab.
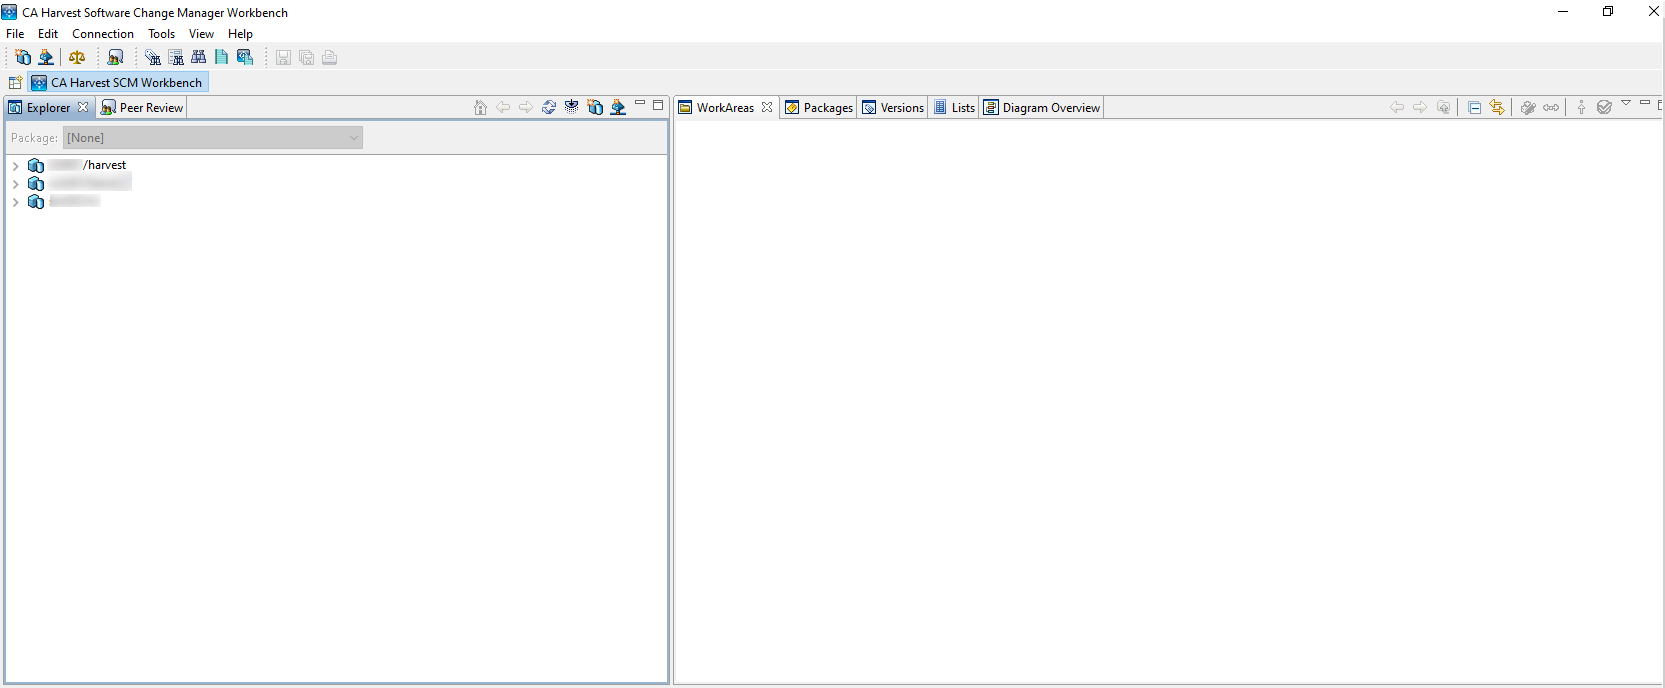
At least I was now able to access the code by using the GUI. My next question was, how can I checkout the code in an automated way for providing it to the build agent?
References:
Broadcom - CA Harvest Software Change Manager
2. Checkout from Harvest in an automated way by using Powershell
There exists a useful API to conduct the checkout in an automated way by using a Powershell script. Within the install directory of Harvest exists the “hco.exe”. By providing the necessary commands, (see Broadcom - hco Command-Check-out), the code can be checked out at a directory of your choice.
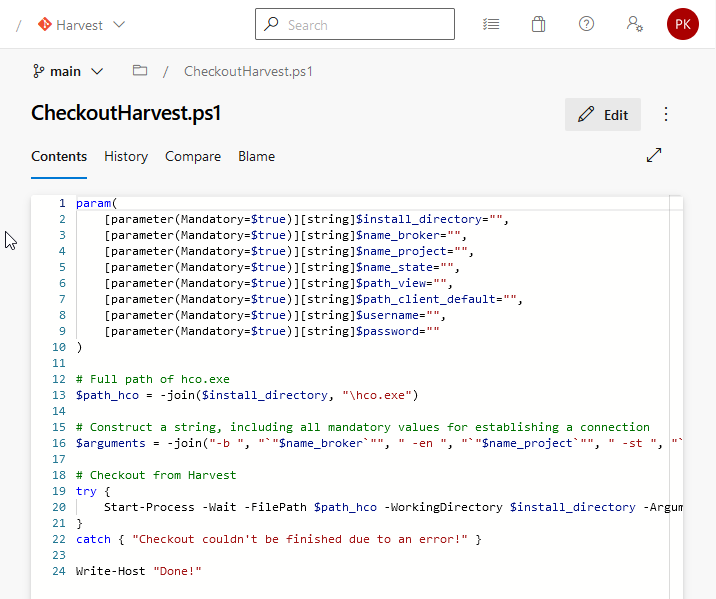
I’ve chosen PowerShell for the implementation of the checkout from Harvest by using hco.exe. The script, named “CheckoutHarvest.ps1”, can be seen below:
param(
	[parameter(Mandatory=$true)][string]$install_directory="",
	[parameter(Mandatory=$true)][string]$name_broker="",
	[parameter(Mandatory=$true)][string]$name_project="",
    [parameter(Mandatory=$true)][string]$name_state="",
    [parameter(Mandatory=$true)][string]$path_view="",
    [parameter(Mandatory=$true)][string]$path_client_default="",
    [parameter(Mandatory=$true)][string]$username="",
    [parameter(Mandatory=$true)][string]$password=""
)

# Full path of hco.exe
$path_hco = -join($install_directory, "\hco.exe")

# Construct a string, including all mandatory values for establishing a connection
$arguments = -join("-b ", "`"$name_broker`"", " -en ", "`"$name_project`"", " -st ", "`"$name_state`"", " -vp ", "`"$path_view`"", " -br -op pc -o checkout.log -s *.* -dcp ", "`"$path_client_default`"", " -usr ", "`"$username`"", " -pw ", "`"$password`"")

# Checkout from Harvest
try {
    Start-Process -Wait -FilePath $path_hco -WorkingDirectory $install_directory -ArgumentList $arguments
}
catch { "Checkout couldn't be finished due to an error!" }

Write-Host "Done!"
That Powershell Script is used in the Azure DevOps Build Pipeline, which is explained in the following sections.
References:
Broadcom - hco Command-Check-out
3. Azure DevOps Build Pipeline for Checkout from Harvest and Building a Solution
My approach for creating the Azure DevOps Build Pipeline is simple: using the dedicated Powershell Script for doing the checkout of the code from Harvest. The destination location of the source is the Build Sources Directory of the Agent, so at that place at which the Agent Pipeline Service expects the source code to be checked out.
Of course, you could checkout the source from Harvest at any other directory on your Agent, but one advantage in that case would be, that you don’t have to care about the clean up for a build: simply let the Azure DevOps Build Pipeline manage the clean up.
3.1 The Agent
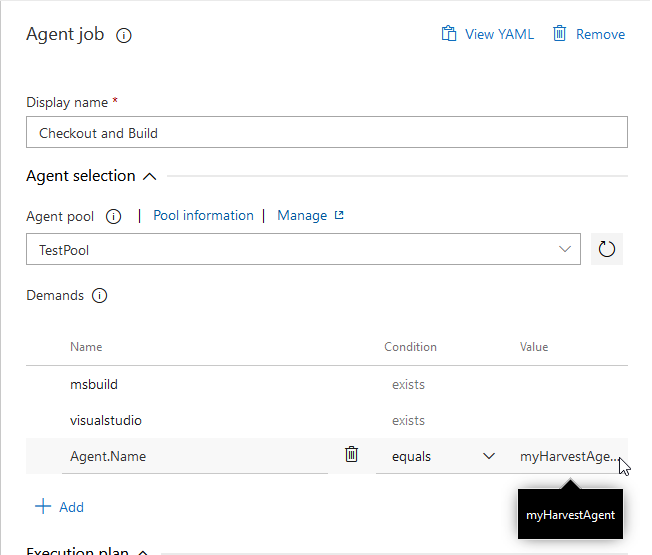
I’ve chosen a Windows 10 Operating System for the Agent, at which I’d like to trigger Job of the Azure DevOps Build Pipeline. So, at this Agent, I’ve deployed the “CA Harvest Software Change Manager” and the further necessary Build Tools. The Agent is registered within the “TestPool” as “myHarvestAgent”.

3.2 The Git Repository
The title of the subsection probably confuses, so I’d like to explain why I’m using a Git Repository anyway (although the code is checked out from Harvest). At first: the Azure DevOps Build Pipeline requires a source. And for the second: I simply would like to version control my Powershell Script and further more I need to deploy it on the Agent in an automated way.
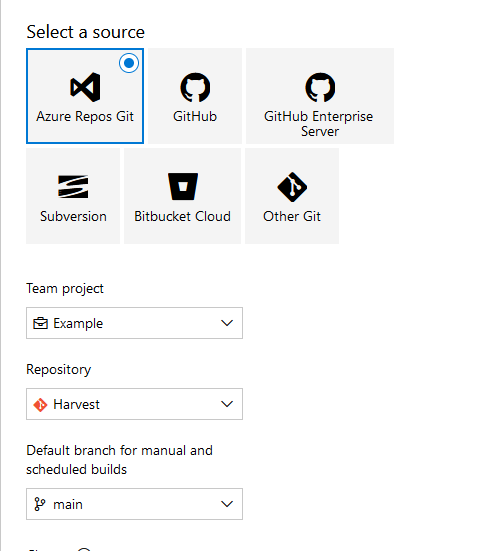
Therefore I’m using the Git Repository “Harvest” as source for the Pipeline, which includes the “CheckoutHarvest.ps1” Powershell Script.
3.3 The Pipeline
As already mentioned, the Build Pipeline is using the Git Repository “Harvest” as source:
At “Agent job”, I’m adding a specific demand, that this Build Pipeline just triggers jobs at the Agent “myHarvestAgent”:
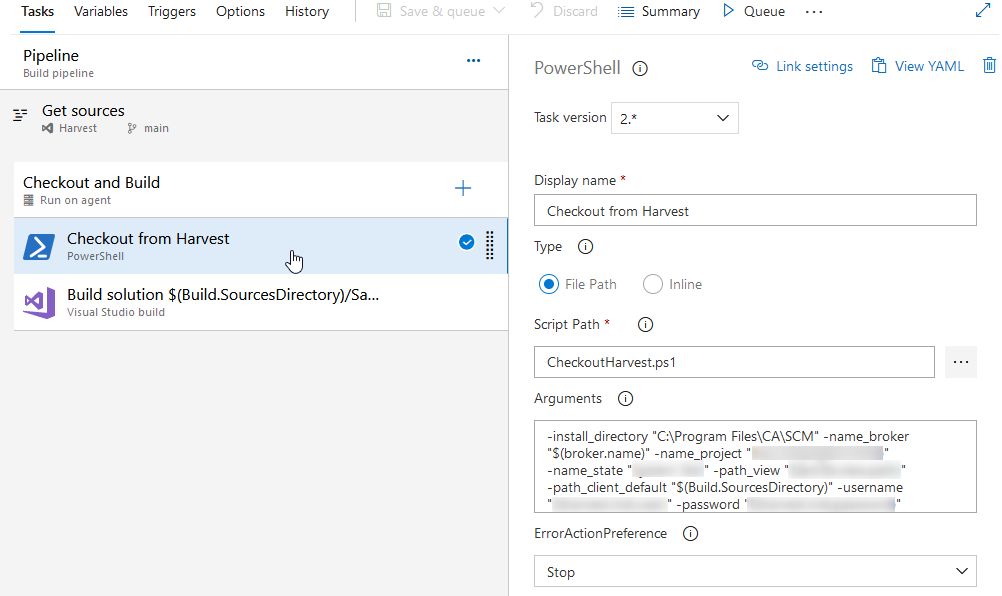
Let’s get now to the most interesting task: the Checkout from Harvest by using the Powerhell Script: I’m using the task “Powershell” and I choose the “CheckoutHarvest.ps1”, which is included in the Git Repository. At “Arguments”, I’m providing all necessary arguments for the scripts: the name of the broker, the name of the project, etc. The argument “-path_client_default” gets as value the predefined variable $(Build.SourcesDirectory). So I’m using the local path on the build machine, at which the Azure DevOps Build Pipeline downloads the source files by default.
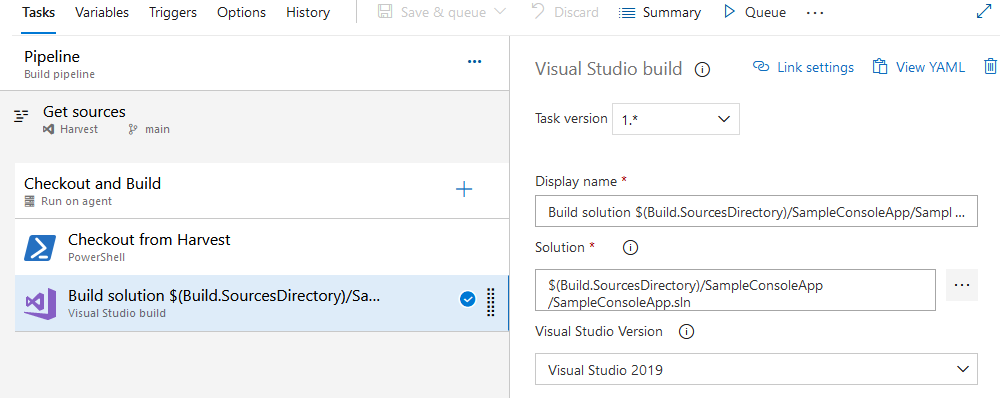
The next task is about building the solutions: the solution is therefore also included within the directory of the $(Build.SourcesDirectory).
After conducting those two tasks, the corresponding checkout directory of the Azure DevOps Agent would look like as seen in the picture below:
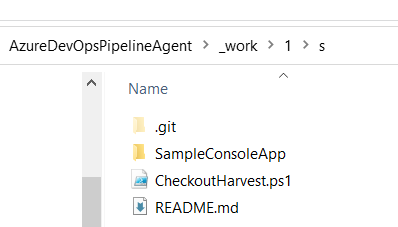
It contains the “CheckoutHarvest.ps1” Powershell Script and in addition it also contains the directory of a simple Console Application, named “SampleConsoleApp” (which was checked out from Harvest).
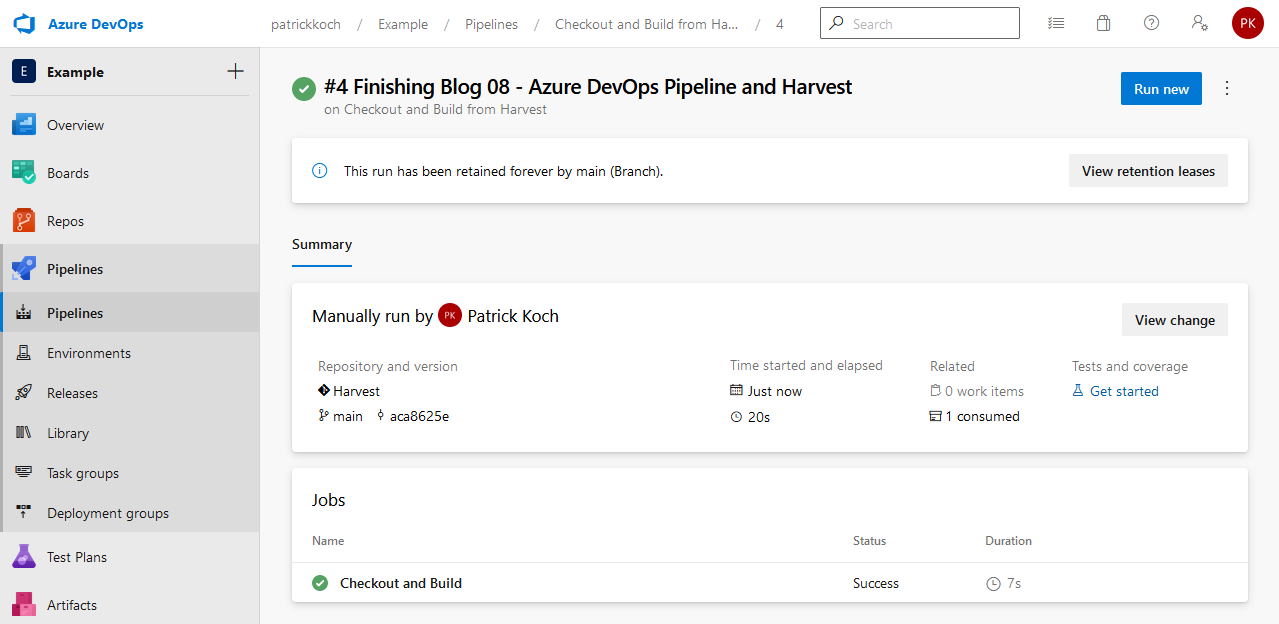
Finally, the job of the Build Pipeline succeeded:

References:
Microsoft - Azure DevOps - Use predefined variables
4. Conclusion
Although we won’t use this build automation for a long time, it was worth it to transfer it to the Azure DevOps Server. I really prefer to rely on triggering a job of a pipe, which I’ve designed by myself, than getting nervous after triggering scripts (which were created many years ago - written in a script language, for which I don’t possess a deeper knowledge) in a manual way and hoping the build succeeds. The checkout by using the hco.exe API works, I’ve just recognized that it may take a while to finish the checkout, especially in case of huge files. An alternative would be to move the code from Harvest to Git, but in that case the history would get lost, or I’d have to find a way to transfer the history from Harvest to Git. Finally, it’s great get another sustainable pipeline, instead of relying on manual steps to get a build.