The intention of this post is to explain an example usage of a File Share for a Windows Container Workload
1. Introduction
A File Share might be useful, if you would like to save and store files, generated by some operations done inside a Container (or inside a set of Containers). Of course, a Container is not intended to serve as a permanent store - it should be a lightweight instance, executing a specific task. Accessing a File Share from instances, as for instance Containers, within the Azure Cloud is quite simple, as this posts explains. It is a good approach to provide necessary information, as credentials for the File Share, by deploying a Workload resource and using Environment Variables. So I’m going to explain how several resources work together within the Azure Cloud to demonstrate the usage of a File Share. In that case it’s about following resources:
- Storage Account: contains the “File Share” as data object
- File Share: serves as data storage for files, generated through operations inside the Container
- Container: running within the Azure Kubernetes Service, generating (Text) files, storing them at the File Share
- Azure Kubernetes Service: for deploying the Windows Container Workload resource
2. Setting up a Storage Account in Azure Portal
Before creating the File Share, it is necessary to create a Storage Account. Further data objects of a Storage Account in Azure would be for instance blobs, tables, disks, etc. Therefore, within this section it is described how a Storage Account is created:
At first, search for “Storage Account” within the Azure Portal and click at “Create”.
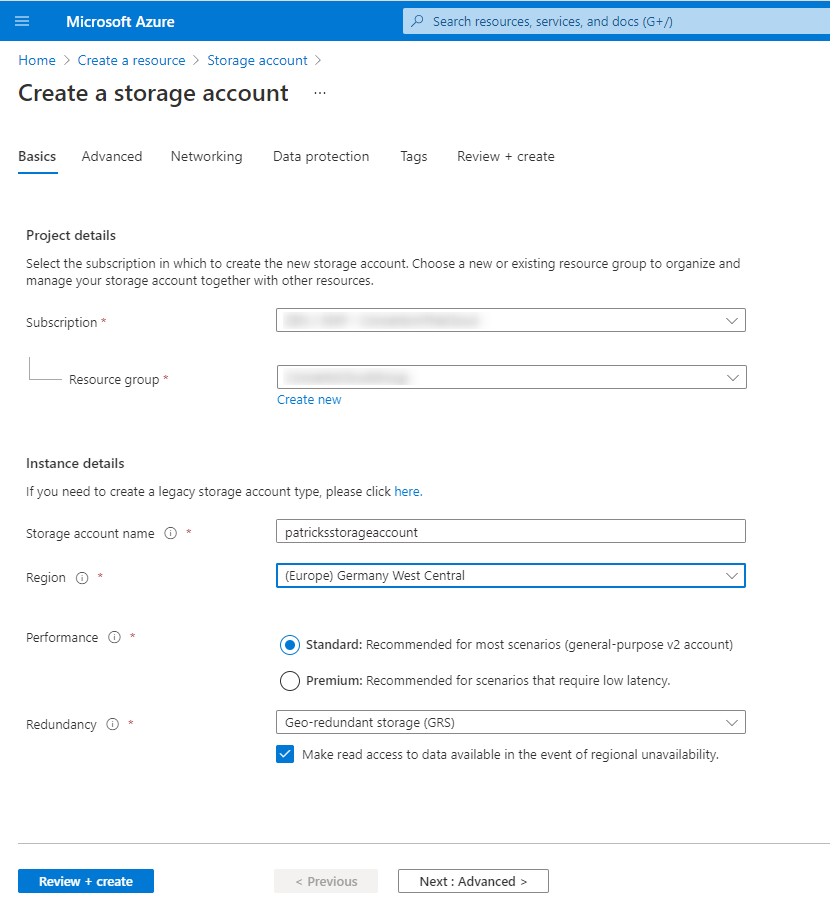
At the “Bascis” tab, a name can be chosen for the Storage account name - in my example the name is “patricksstorageaccount”. I’d prefer to set the further settings as shown in the pictures below - except of the “Region” - choose a region which fits best to you, respectively which is close to you.
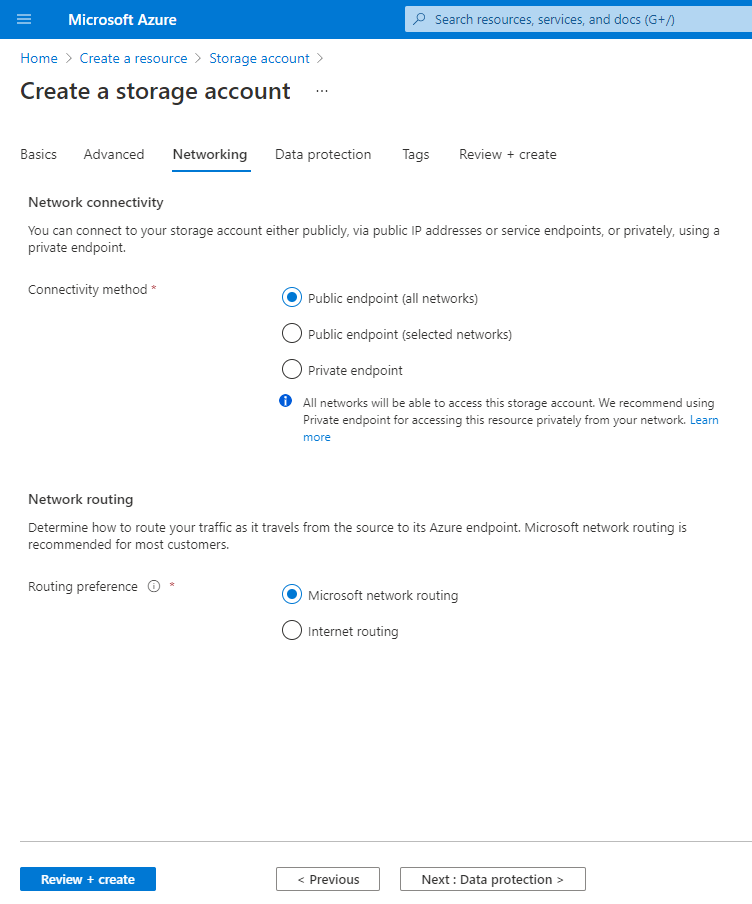
At the tab “Networking”, choose “Public endpoint (for all networks)” for the Connectivity method.
Finally, the “Storage Account” is deployed and ready for usage.
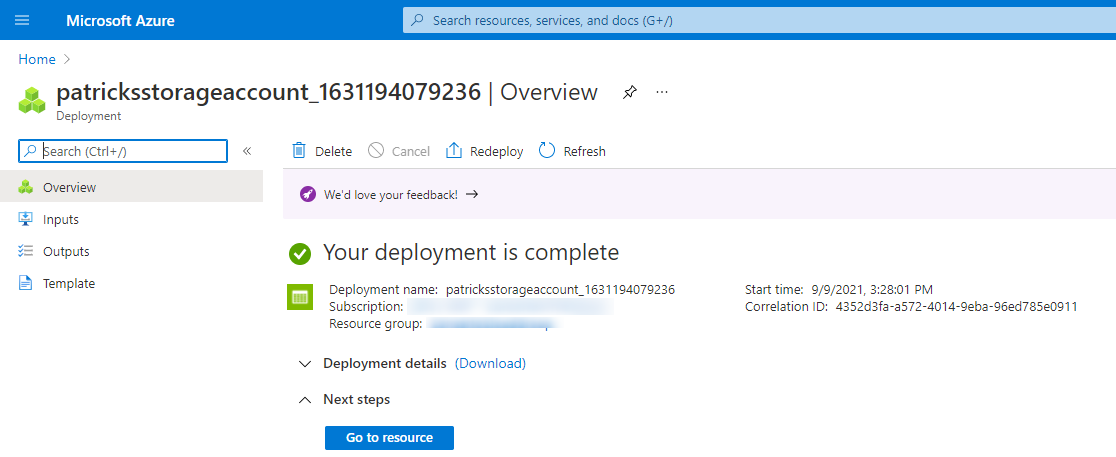
In the next section the necessary “File Share” will be created as data object of the “Storage Account”.
References
Microsoft - Azure - Storage account overview
3. Creating a File Share as data object within the Storage Account
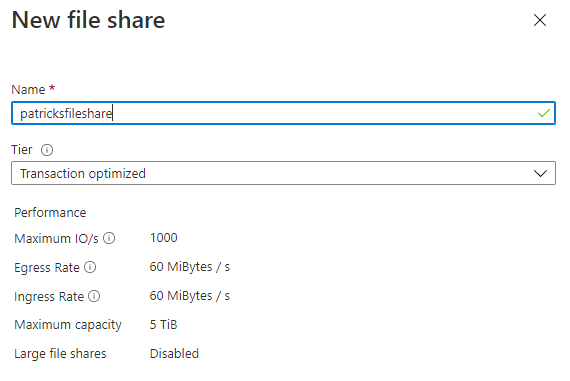
As the “Storage Account” is created, it is possible to create a “File Share”: click at “File share” next to the “+” sign…

…and following dialogue appears. Provide an arbitrary name for the share - I’m going to choose “patricksfileshare”.
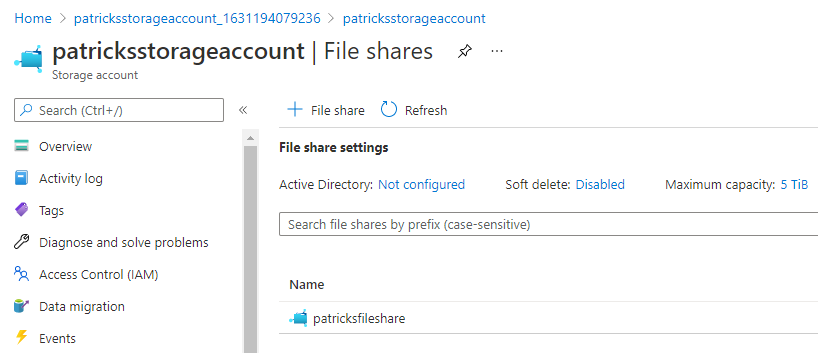
After confirming the creation of the File Share, it appears as part of the Storage Account, as seen in the picture below:
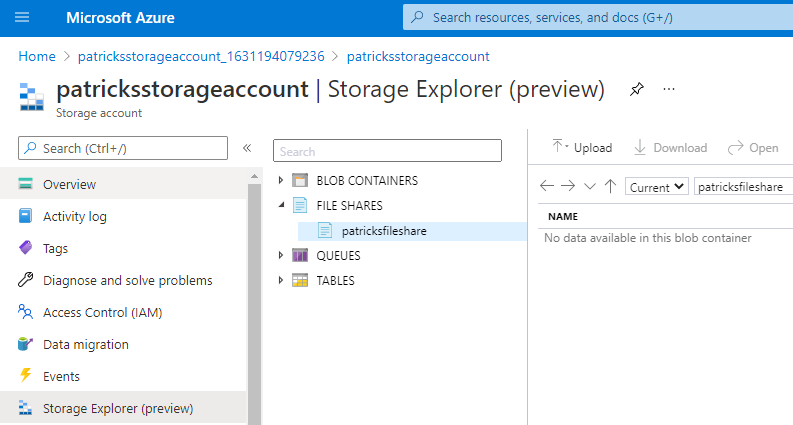
A really nice feature is the “Storage Explorer (preview)”. As the name indicates, it is still a preview. But it already works well, at least e.g.: for showing files included within the file share or for deleting them. Currently, no data is included within it.
If the “Connect” button is chosen by selecting the File Share, then the Azure Portal already provides the corresponding Powershell Script commands, necessary to access the File Share. It is not mandatory to use that specific snippet, it is of course also possible to access the File Share in a different way, e.g.: by using the “net use” command. In my case I’d need it for a Windows system.
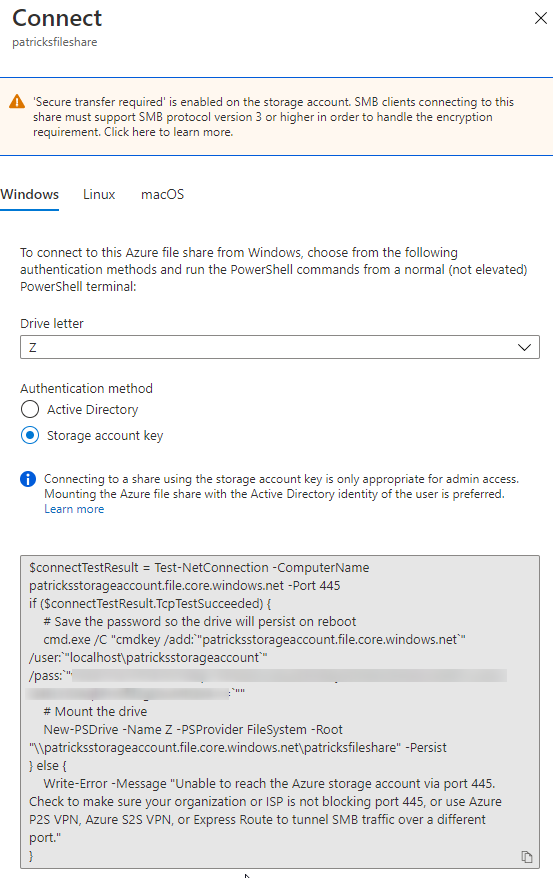
In the next section, I’m going to explain how this Powershell Script snippet can be used to access the File Share from the Container.
References
Microsoft Docs - Powershell - New PS Drive
4. Windows Container capable of accessing the File Share by using the Powerhell Script
Within this section, the Container File is explained and in addition how the Container is builded and published to a Container Registry.
4.1 The Dockefile explained
The Dockerfile is quite simple: it is derived from a Windows Server Core Image. I put a “Powershell” Script inside, named “Start.ps1”, which serves as Entrypoint and in addition it contains the necessary commands for accessing the File Share.
FROM mcr.microsoft.com/dotnet/framework/runtime:4.8-windowsservercore-ltsc2019

WORKDIR "C:/Scripts"

ADD "Scripts/Start.ps1" "C:/Scripts"

ENTRYPOINT powershell -File Start.ps1
The following code, which can be seen in the snippet below, refers to the content of the “Start.ps1” Powershell Script. At first, a set of Environment variables is declared. They get assigned by applying the corresponding Workload resource, which contains the necessary values for the Environment variables, e.g.:
- Mount Letter
- Name of the File Share
- Username
- Password
After assigning the environment variables, the commands are included capable of establishing the access to the File Share. Within this example, a simple text file is going to be created to prove that the File Share was accessed properly by the Container.
Write-Host "Start.ps1 script started...`n"

if($env:mount_letter) {
	$mount_letter = $env:mount_letter
}
else {
	Write-Host("Provide value for: mount_letter")
}
if($env:azure_storage) {
	$azure_storage = $env:azure_storage
}
else {
	Write-Host("Provide value for: azure_storage")
}
if($env:azure_fileshare_name) {
	$azure_fileshare_name = $env:azure_fileshare_name
}
else {
	Write-Host("Provide value for: azure_fileshare_name")
}
if($env:user) {
	$user = $env:user
}
else {
	Write-Host("Provide value for: user")
}
if($env:password) {
	$password = $env:password
}
else {
	Write-Host("Provide value for: password")
}

# Try to read the hostname
$hostname = "mycontainer"
try {
	$hostname = [System.Net.Dns]::GetHostName()
}
catch {
	Write-Host "Hostname could not be read!"
}

$azure_storage_root = -join("\\", $azure_storage, "\", $azure_fileshare_name)
$share_file_path = -join($mount_letter, ":\", $hostname, "_file.txt")

# Print User Input
Write-Host("------------ Following data/arguments will be used ---------------")
Write-Host("Mount Letter: $mount_letter")
Write-Host("Mount Letter: $azure_storage")
Write-Host("Mount Letter: $azure_fileshare_name")
Write-Host("Mount Letter: $azure_storage_root")
Write-Host("Mount Letter: $share_file_path")
Write-Host("Mount Letter: $user")
Write-Host("------------------------------------------------------------------")

# Establish connection to File Share "patricksfileshare"
$connectTestResult = Test-NetConnection -ComputerName $azure_storage -Port 445

if ($connectTestResult.TcpTestSucceeded) {
    # Save the password so the drive will persist on reboot
    cmd.exe /C "cmdkey /add:`"$azure_storage`" /user:`"$user`" /pass:`"$password`""
    # Mount the drive
    New-PSDrive -Name $mount_letter -PSProvider FileSystem -Root "$azure_storage_root" -Persist

    New-Item -Path "$share_file_path" -ItemType "file" -Value "This is an example text for the file inside the share."

} else {
    Write-Error -Message "Unable to reach the Azure storage account via port 445. Check to make sure your organization or ISP is not blocking port 445, or use Azure P2S VPN, Azure S2S VPN, or Express Route to tunnel SMB traffic over a different port."
}
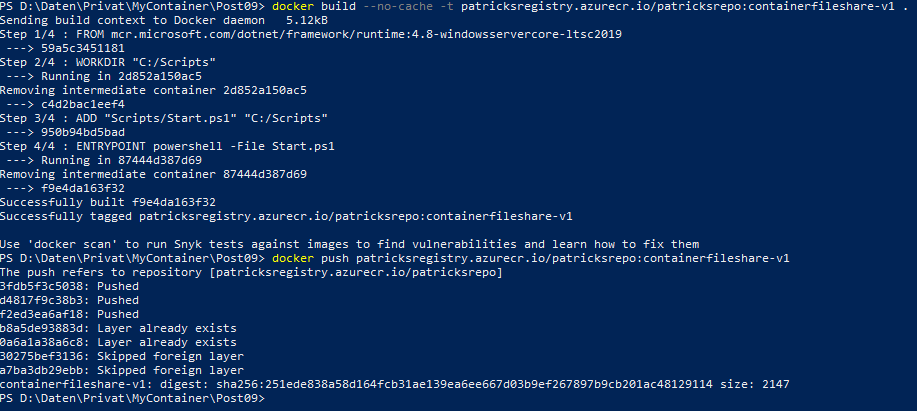
4.2 Build and Publish to a Container Registry
In the picture below, it can be seen how the Dockerfile is used to be built and how the resulting Container Image is uploaded to a Container Registry named “patricksregistry”. This Container Image will be used for deriving a running Container Instance inside the Azure Kubernetes Service.
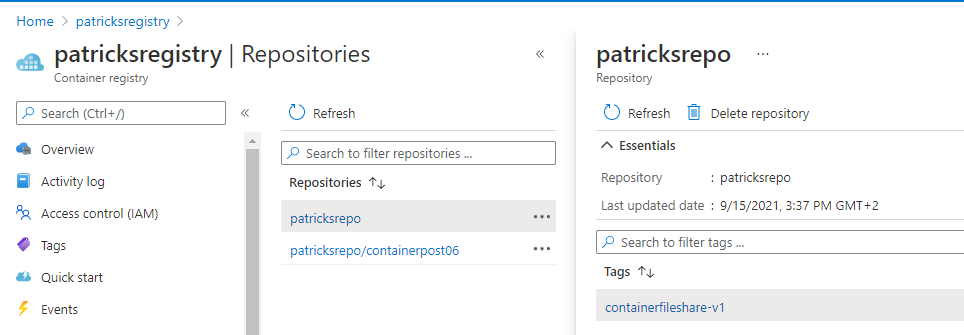
Switching to the Container Registry within the Azure Portal reveals that the Container named “containerfileshare-v1” is available at the registry.
5. Deployment of the Windows Container Workload at an Azure Kubernetes Service
In this section, the Container Workload is described and in addition how the Workload is applied to the Azure Kubernetes Service. During the runtime of the Container, the File Share is accessed and a generated (Text) file will be stored.
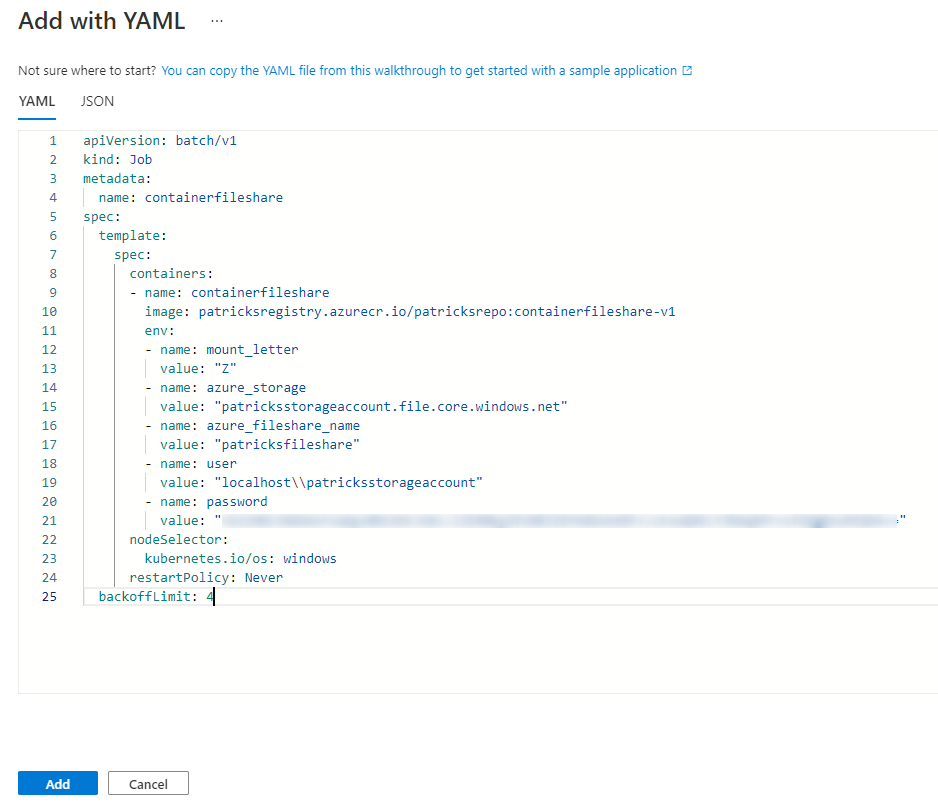
5.1 The Container Workload including assigned values for the Environment Variables
The following snippet contains YAML code, which serves as Workload resource from type “Job”, ready to be applied at the Azure Kubernetes Service. Important parts are the image, which refers to the Container Image, stored at “patricksregistry” and the necessary Environment variables for enabling a proper access to the File share:
apiVersion: batch/v1
kind: Job
metadata:
  name: containerfileshare
spec:
  template:
    spec:
      containers:
      - name: containerfileshare
        image: patricksregistry.azurecr.io/patricksrepo:containerfileshare-v1
        env:
        - name: mount_letter
          value: "Z"
        - name: azure_storage
          value: "patricksstorageaccount.file.core.windows.net"
        - name: azure_fileshare_name
          value: "patricksfileshare"
        - name: user
          value: "localhost\\patricksstorageaccount"
        - name: password
          value: "**********************************"
      nodeSelector:
        kubernetes.io/os: windows
      restartPolicy: Never
  backoffLimit: 4
5.2 Deployment of the Container Workload at the Azure Kubernetes Service
At the Azure Kubernetes Service, a new Workload from type “Job” is created by inserting and confirming the following YAML code:
Therefore the Workload is going to be created and running…
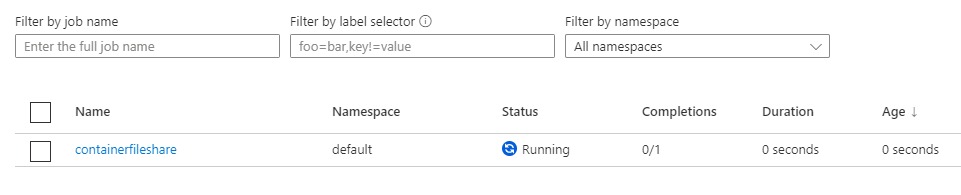
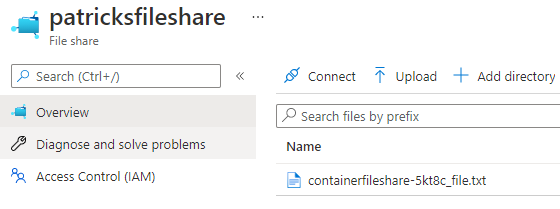
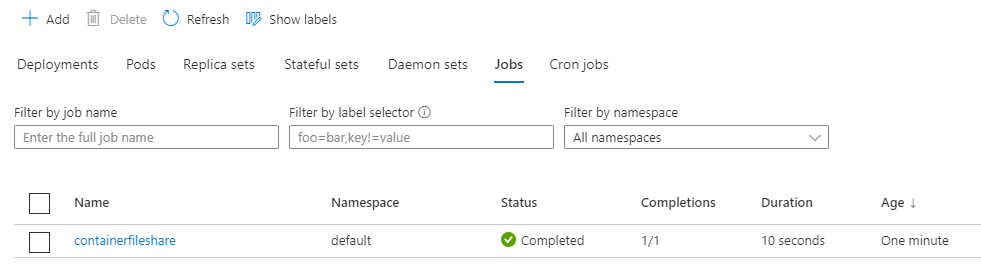
Clicking at the “containerfileshare” leads to the Pod with the arbitrary appendix “5kt8c”. Clicking at the Pod…

…leads to the Container, which gets the state “Completed” after doing his job - in that case: accessing the File Share and generating a text file, which name contains the host name of the Container and “-file” as appendix.
Going back to the File Share proves that the Container has done his job in a correct way, as the file exists.
That’s the Use Case, which I wanted to achieve and to explain within this post.
6. Conclusion
Creating a File Share within the Azure Portal is simple and can be done within a few minutes. The File Share can also be accessed in very comfortable way, as the Azure Portal already suggests some proper working code for that purpose. In my example, I’ve passed the credentials to access the File Share by using Environment Variables within the Powershell Script and by assigning the corresponding values in the YAML File. That’s fine for the demonstration in this post, but if you’d like to use such Use Case similar to my example, ensure that no credentials are included hardcoded within the YAML file, which is stored in a e.g.: Get repository.
GitHub References
GitHub - patkoch - Container Files
References
Microsoft - Azure - Storage account overview