The intention of this post is to explain how to implement Azure DevOps Pipelines, which are capable to provision (and to destroy) a Windows Virtual Machine in Azure using Terraform.
1. Introduction
Provisioning resources in the cloud is (or will be) part of the everyday work of probably each DevOps or Cloud Engineer, if your company would like to provide cloud solutions. Using infrastructure as code tools like Terraform make it easier to achieve that goal, but of course you don’t want to do that in a manual way - you probably also would like to integrate that tasks in DevOps platform tools like the Azure DevOps Server of Microsoft. In this post, I’d like to explain how to set up dedicated pipelines for doing the provisioning - in that case of a (Windows) virtual machine - and the destruction.
2. Overview
There are several services, which are mandatory for that implementation, let’s start with an overview:
- Azure DevOps Pipelines: Conducting the automated provisioning/destruction of the virtual machine
- Storage Account including Container: Storage of the Terraform State Files
- Service Connection: Establishing a connection between the Azure DevOps Server and the Azure subscription
- Azure Repo: Versioning of the Terraform configuration file
- Azure DevOps Agent: Dedicated Agent for running the Pipelines Jobs, including the mandatory prerequisites (among others Terraform)
- Azure Subscription: Cloud platform, ready to create and to host services, as virtual machines, storage accounts, …
- Terraform configuration: Defines the necessary rules for the resource - the virtual machine
3. The implementation of the Azure DevOps Pipelines
Let’s go through the list, step by step, for getting the implementation done.
3.1 The Azure DevOps Agent
Ensure, that you’ve an Agent ready in one of your Agent Pools, which are capable of applying Terraform configurations.

I’ve prepared a Linux Container (Terraform and the Azure CLI installed), running it on my machine and registering it in my “TestPool” with the random Agent Name “64a80fa7e409”. That’s just for the demonstration, for real productive environments I’d of course suggest to host the Container at dedicated Kubernetes cluster. Ensure that an Agent is registered and ready, you can also deploy the Azure DevOps Pipeline Service on your machine and in addition installing Terraform - but as I’ve already created a Container including the prerequisites, I prefer to run the Container.
3.2 The Storage Account including a Container
Terraform uses State Files, to determine the state of the resource, so if it is e.g.: provisioned or already destroyed. If you provision the resource in a manual way from your machine, than everything is fine, as the place from which you’re triggering the Terraform commands is always the same. This won’t work for pipelines - imagine you trigger a job for a pipline on Agent 1, which provisions the resource and after some time, you decide to destroy the resource - therefore you’re going to trigger the dedicated pipeline for doing the destruction - but what if not Agent 1 is choosen for running the job? An Agent which is not Agent 1 won’t contain the mandatory State Files, for determining the current state of the resource. In that case, Terraform could report that there is nothing available to destroy. Therefore, it is a good idea to find a unique spot for the State Files - that would be the Container, which is included in a Storage Account.
For that, I’ve created a Container named “virtualmachine” inside my Storage Account “patricksdemostorage”, including the key “vm.state”.
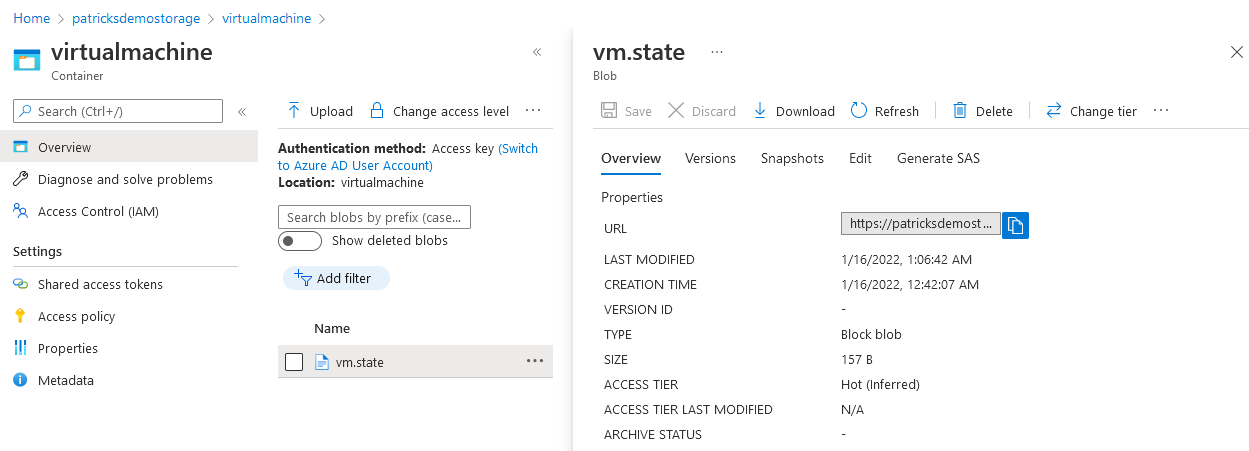
The related snippet of the configuration can be seen below:
  backend "azurerm" {
    resource_group_name  = "patricksdemostorage"
    storage_account_name = "patricksdemostorage"
    container_name       = "virtualmachine"
    key                  = "vm.state"
  }
The Container and the backend configuration ensures that the State Files are stored and accessed at an unique spot only. So, it doesn’t matter whether you’re provisioning the resource from your machine and the destruction is triggered by an Azure DevOps pipeline or vice versa.
3.3 The Service Connection
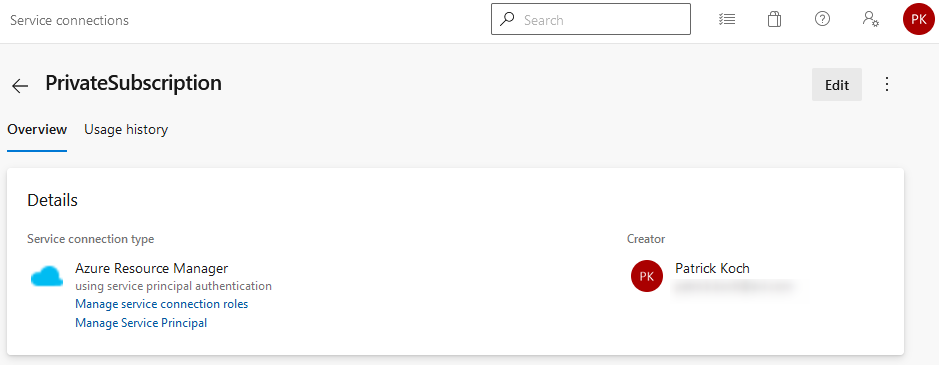
You need to get access from your Azure DevOps Server to your Azure Subscription. To enable that, a Service Connection can help. I’ve named the Service-Connection “PrivateSubscription”. Doing a manual setup would include to enter mandatory information, e.g.: the Tenant ID. Setting up that kind of Service Connection was very easy - just choose the correct type - “Azure Resource Manager” - afterwards you can choose your subscription of choice - the necessary settings will be conducted in an automated way.
3.4 The Azure Repo
I’m versioning the Terraform configuration (.tf file) in an Azure Repo, named “IaC”. Before running the pipelines, you probably would like to try the configuration in a manual way. If the file is already versioned, ensure to add statements to the gitignore file, that no State Files are going to be tracked.

3.5 The Configuration
The configuration, which will be used for provisioning the virtual machine can be seen below. Please see my previous post if you’d like to get more information about the manual way of applying Terraform commands - patrickkoch.dev - Azure/Terraform Prerequisites. In contrast to the configuration used without provisioning from Azure DevOps pipelines, the current configuration contains the mentioned backend part, refering to the Storage Account, respectively the Container. So, applying that configuration leads to a running Windows Virtual Machine.
terraform {
  required_providers {
    azurerm = {
      source  = "hashicorp/azurerm"
      version = "~> 2.65"
    }

    random = {
      source  = "hashicorp/random"
      version = "3.1.0"
    }
  }

  backend "azurerm" {
    resource_group_name  = "patricksdemostorage"
    storage_account_name = "patricksdemostorage"
    container_name       = "virtualmachine"
    key                  = "vm.state"
  }

  required_version = ">= 0.14.9"
}

provider "azurerm" {
  features {}
}

resource "azurerm_resource_group" "example" {
  name     = "example-resources"
  location = "germanywestcentral"
}

resource "azurerm_virtual_network" "example" {
  name                = "example-network"
  address_space       = ["10.0.0.0/16"]
  location            = azurerm_resource_group.example.location
  resource_group_name = azurerm_resource_group.example.name
}

resource "azurerm_subnet" "example" {
  name                 = "internal"
  resource_group_name  = azurerm_resource_group.example.name
  virtual_network_name = azurerm_virtual_network.example.name
  address_prefixes     = ["10.0.2.0/24"]
}

resource "azurerm_network_interface" "example" {
  name                = "example-nic"
  location            = azurerm_resource_group.example.location
  resource_group_name = azurerm_resource_group.example.name

  ip_configuration {
    name                          = "internal"
    subnet_id                     = azurerm_subnet.example.id
    private_ip_address_allocation = "Dynamic"

  # new line to add
  public_ip_address_id = azurerm_public_ip.example.id
  }
}

# new to add
resource "azurerm_public_ip" "example" {
  name                = "acceptanceTestPublicIp1"
  resource_group_name = azurerm_resource_group.example.name
  location            = azurerm_resource_group.example.location
  allocation_method   = "Dynamic"

  tags = {
    environment = "Production"
  }
}

resource "azurerm_windows_virtual_machine" "example" {
  name                = "example-machine"
  resource_group_name = azurerm_resource_group.example.name
  location            = azurerm_resource_group.example.location
  size                = "Standard_F2"
  admin_username      = "adminuser"
  admin_password      = "P@$$w0rd1234!"
  network_interface_ids = [
    azurerm_network_interface.example.id,
  ]

  os_disk {
    caching              = "ReadWrite"
    storage_account_type = "Standard_LRS"
  }

  source_image_reference {
    publisher = "MicrosoftWindowsServer"
    offer     = "WindowsServer"
    sku       = "2016-Datacenter"
    version   = "latest"
  }
}
3.6 The Pipelines
This section explains the structure of the Azure DevOps pipelines, which are capable of provisioning and destroying the resource.
3.6.1 Pipeline for Provisioning
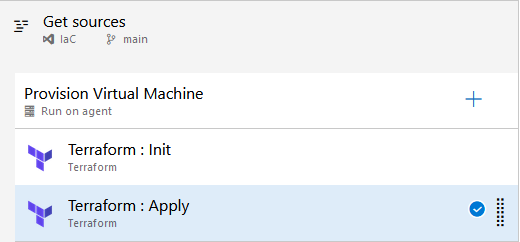
I’m setting up a new pipeline and refer to the mentioned Azure Repo as Source for getting the Terraform configuration.
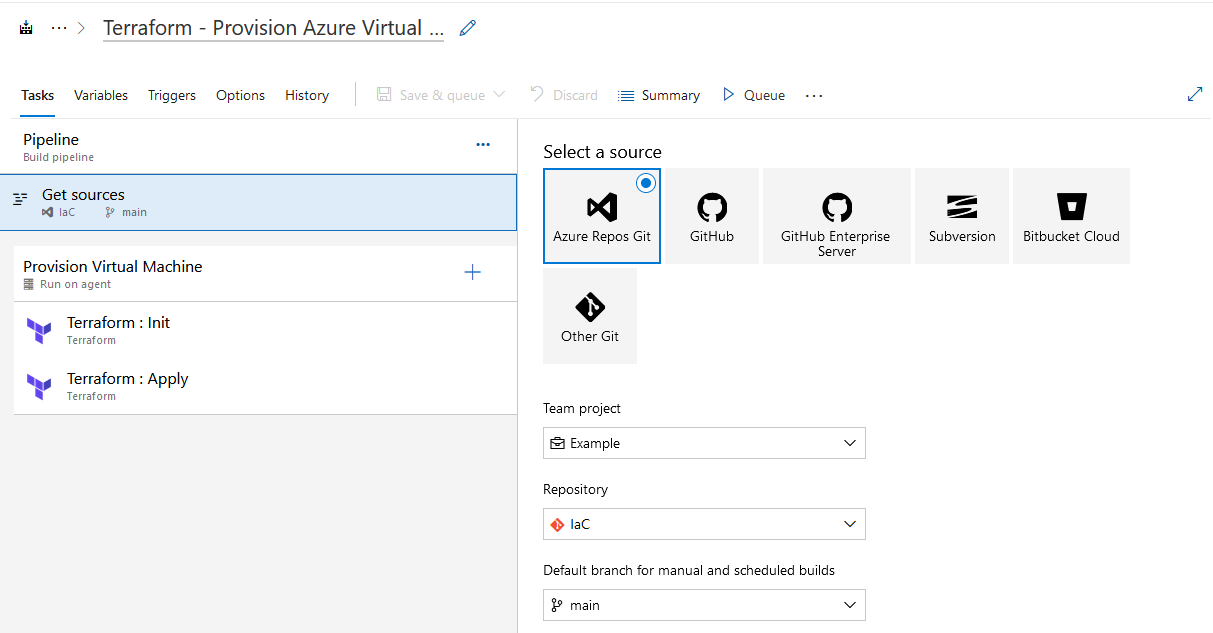
Two Terraform tasks complete the pipeline. The first task takes care of the Terraform - “Init” command.
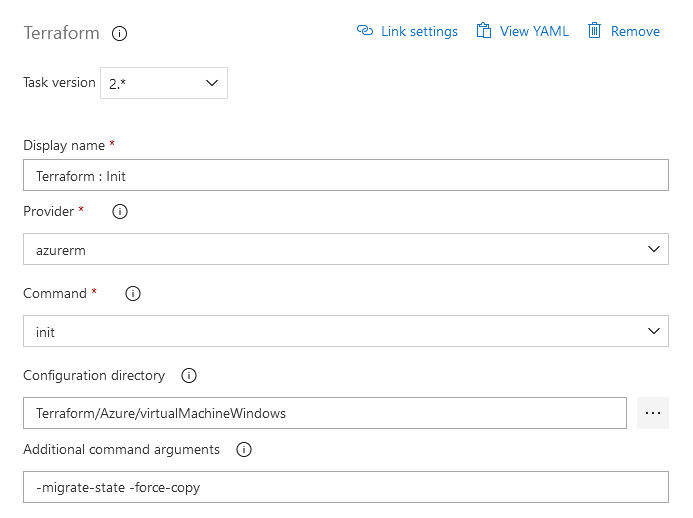
Please note, that the Service Connection “PrivateSubscription” is used. In addition, this task contains information about the dedicated Storage Account, respectively Container which should be used for accessing the State Files.
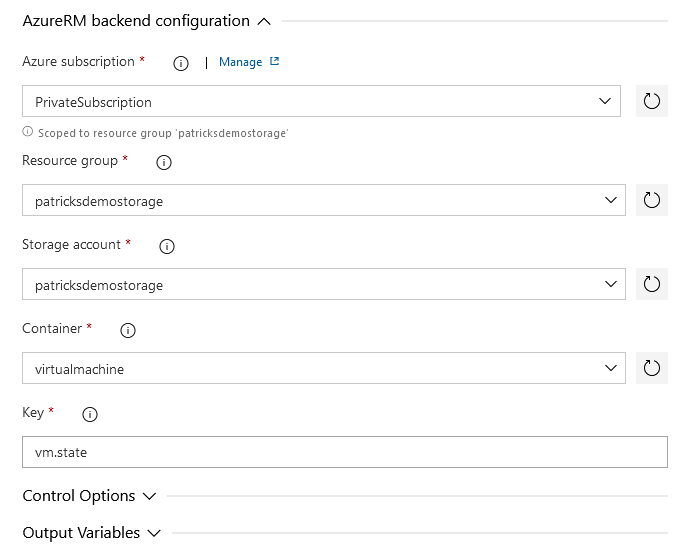
Compare those settings with the mentioned snippet related to the backend configuration of the whole Terraform configuration file:
  backend "azurerm" {
    resource_group_name  = "patricksdemostorage"
    storage_account_name = "patricksdemostorage"
    container_name       = "virtualmachine"
    key                  = "vm.state"
  }
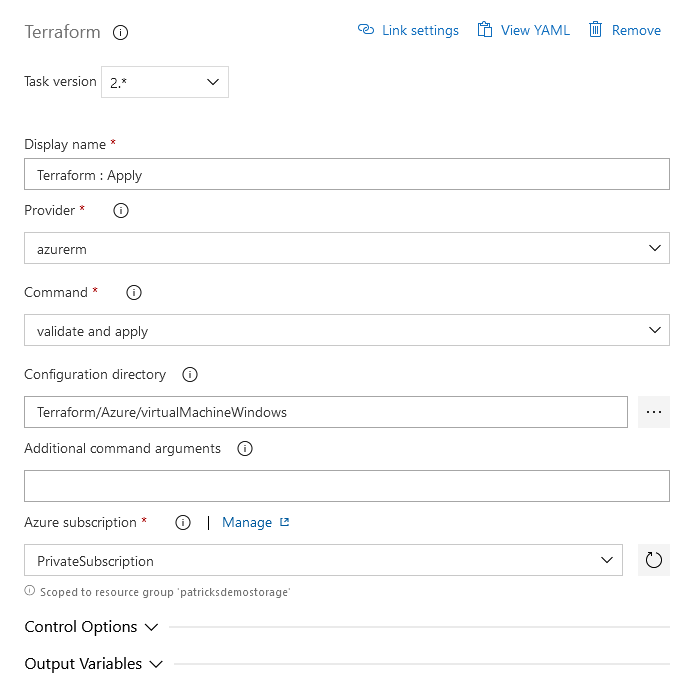
The next command to be integrated should conduct the “Apply”:
That’s less effort than the “Init” task - just choose “validate and apply” and point to the specific directory containing the Terraform configuration file - which is in my case “Terraform/Azure/virtualMachineWindows”.
3.6.2 Pipeline for Destruction
Of course, you’d also like to destroy the resource - therefore I’ve set up a second pipeline. Again, the sources are located in the “IaC” Azure Repo:
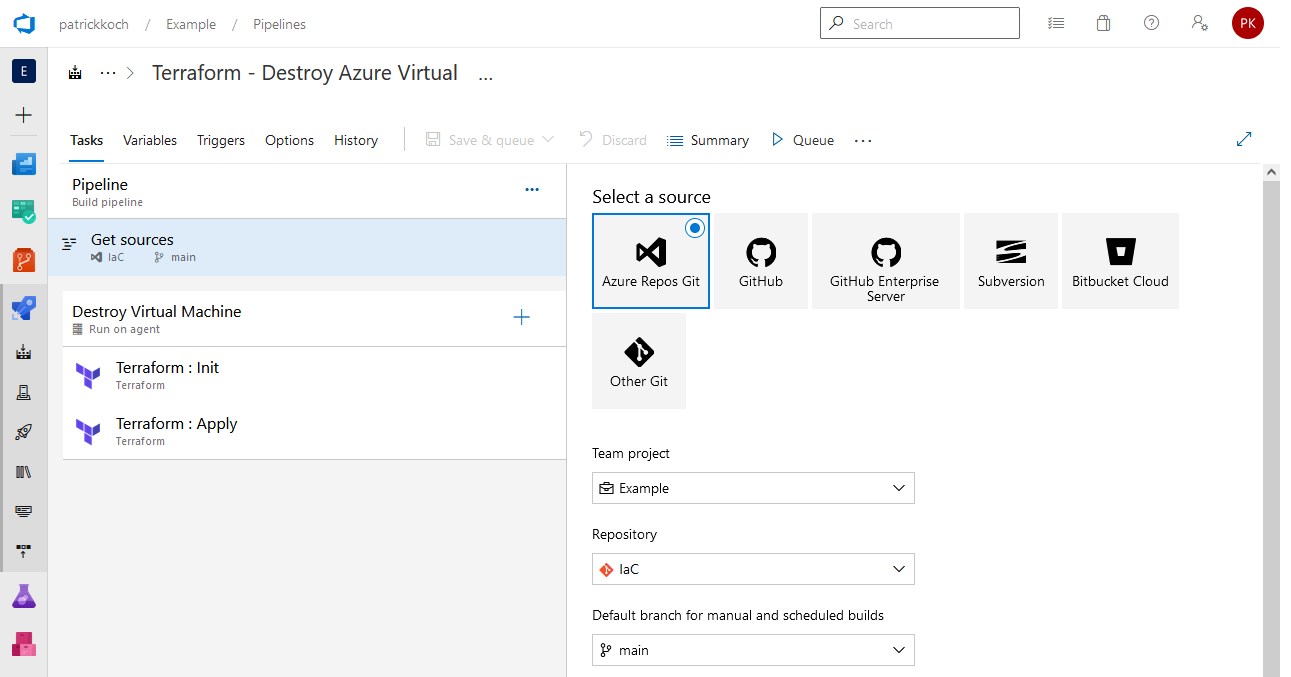
Same as for the previous pipeline: two Terraform tasks are integrated in the pipeline for performing the destruction. The first is again the implementation of the “Init” command - the connection to the backend.
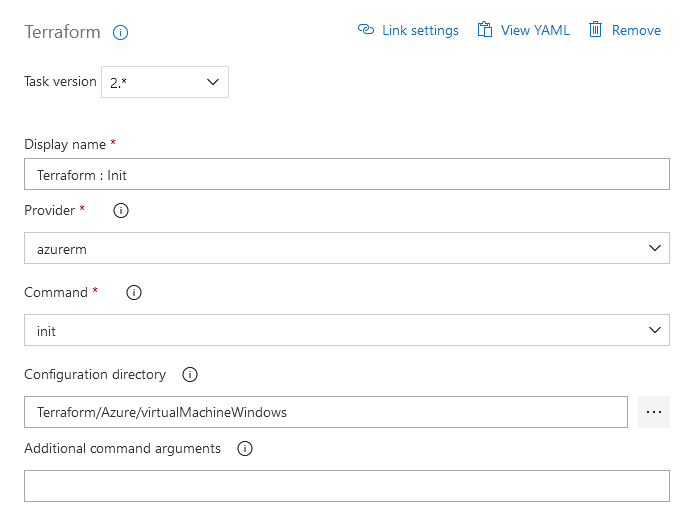
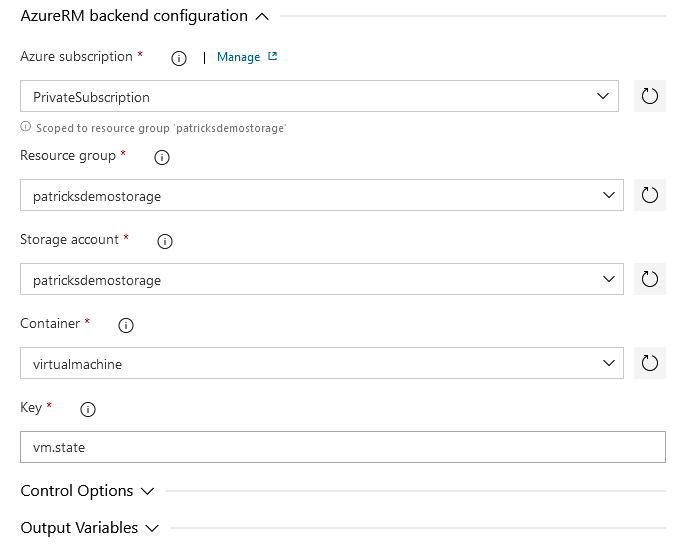
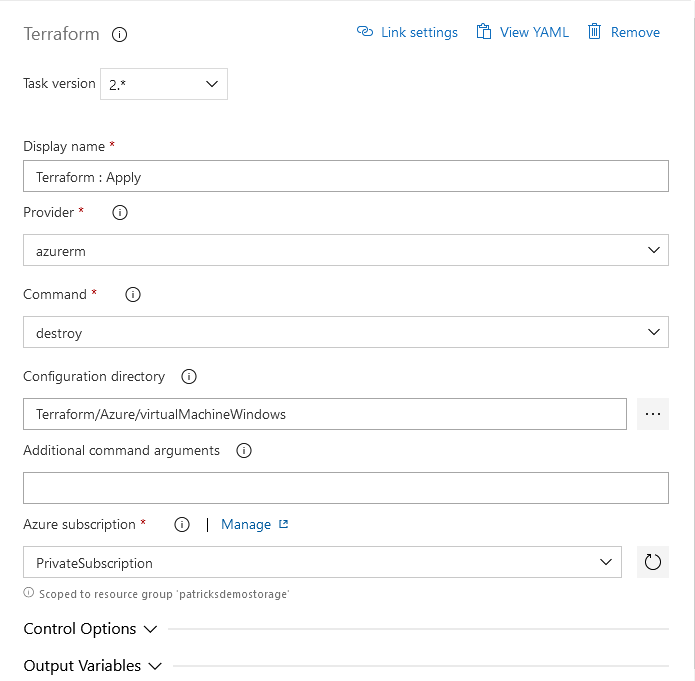
The next task is about the implementation of the “Destroy” command. Select “destroy” at the “Command” section and again refer to the “Private Subscription”, so that the State Files can be updated.
4. Provisioning and Destruction of the Resource with Azure DevOps Pipelines
This section is about running the jobs by triggering the pipelines. Let’s start with the pipeline for conducting the provisioning.
4.1 Provisioning of the Resource with Azure DevOps Pipeline
The pipeline named “Terraform - Provision Azure Virtual Machine” is now triggered …
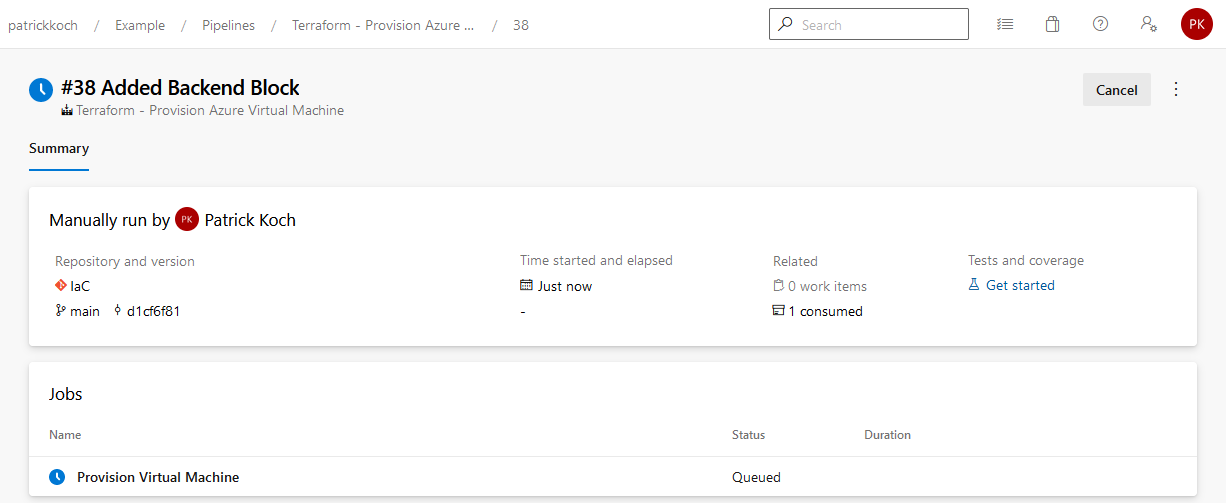
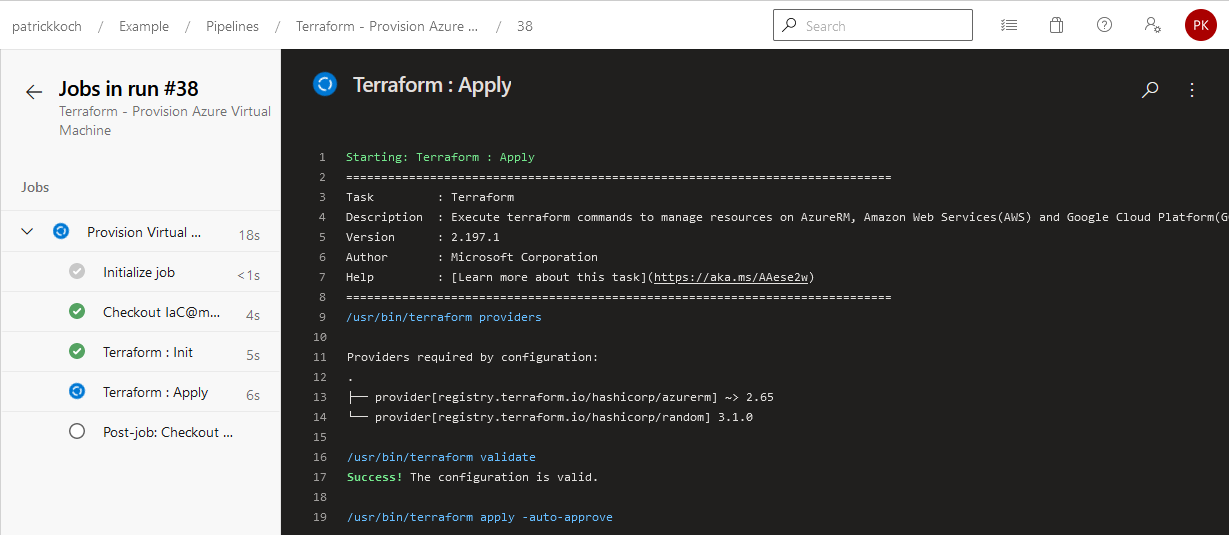
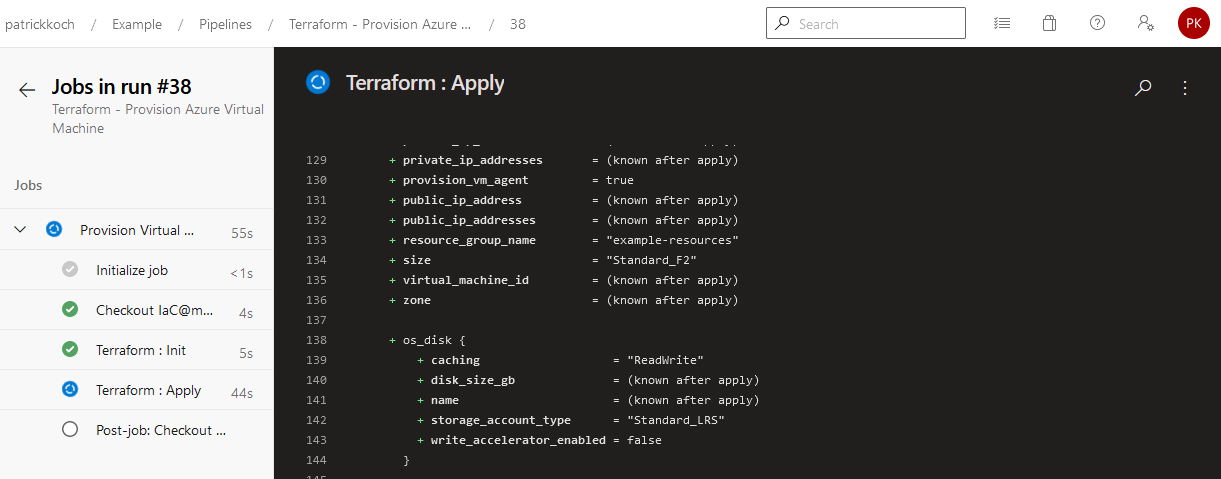
…you should recognize the same logs as you’d conduct the Terraform commands in a manual way…

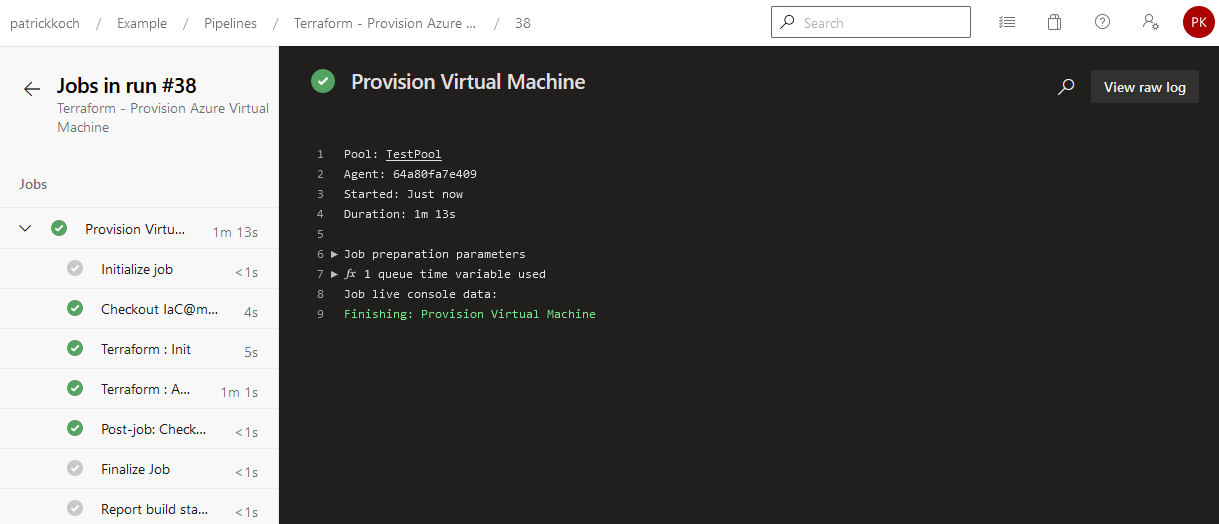
The job of the pipelien succeeded … This results in a running virtual machine, hosted in the Azure cloud.
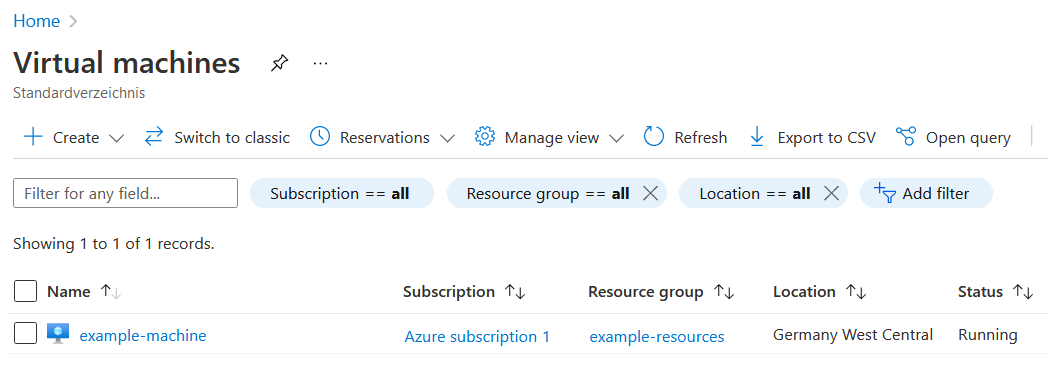
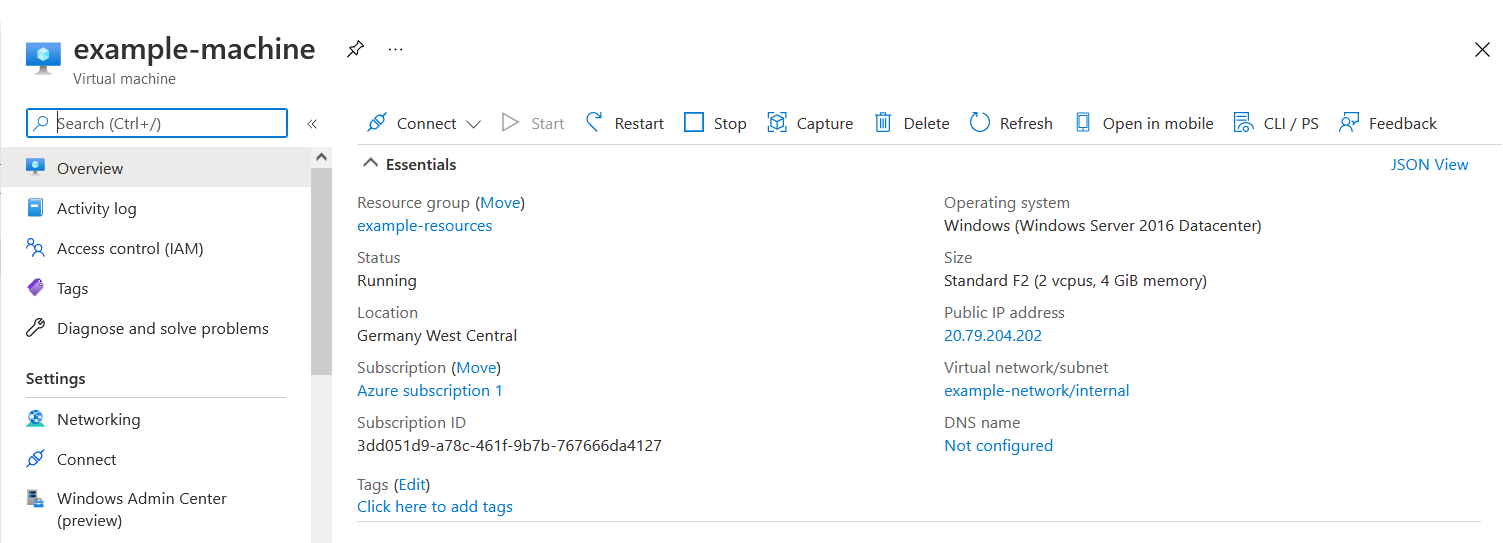
That’s it, the virtual machine was created and is ready for deploying your apps!
4.2 Destruction of the Resource with Azure DevOps Pipeline
Of course, you’d like to destroy the virtual machine if you don’t need it. Let’s trigger the pipeline named “Terraform - Destroy Azure Virtual Machine”…
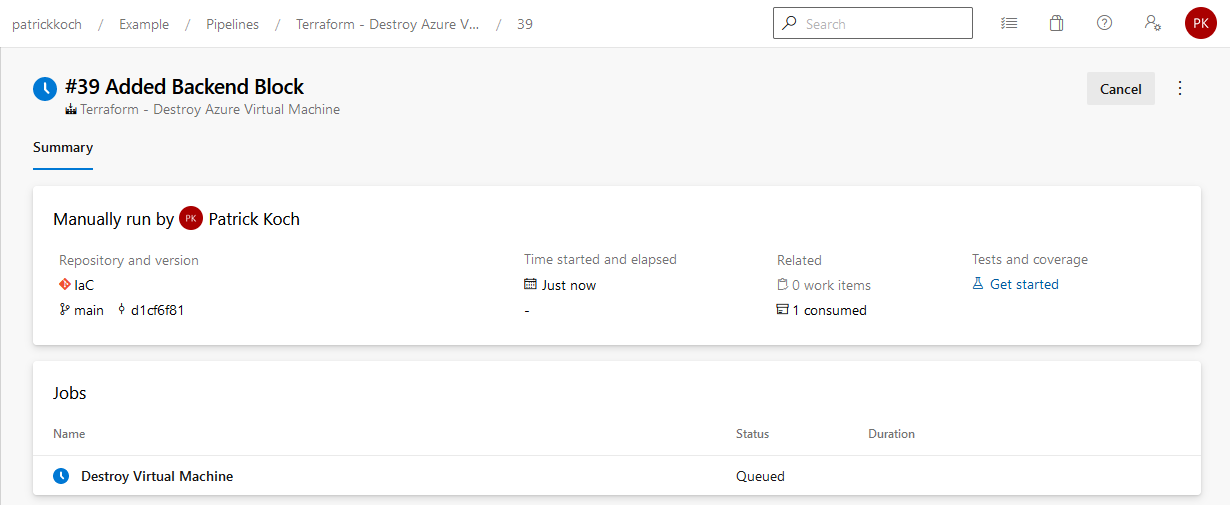
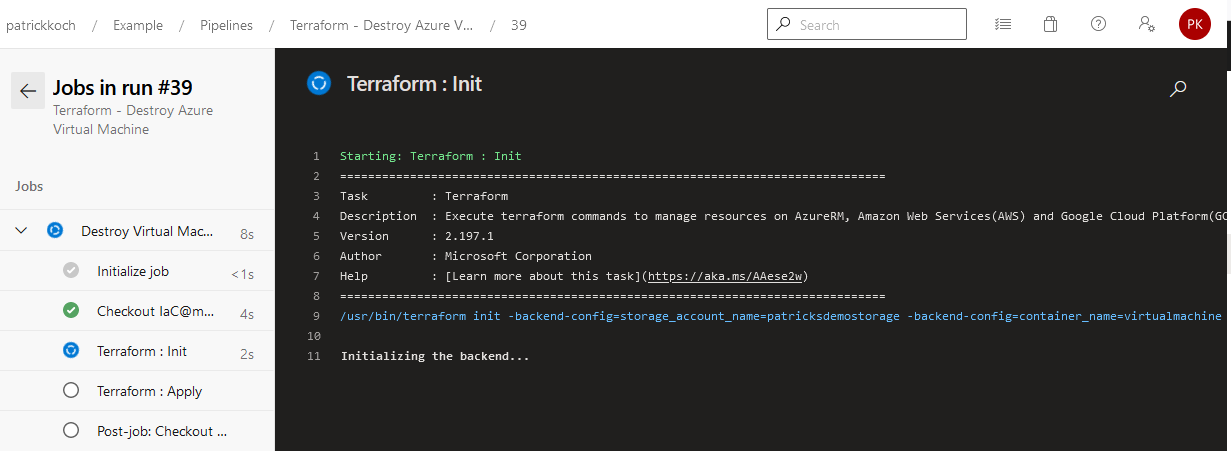
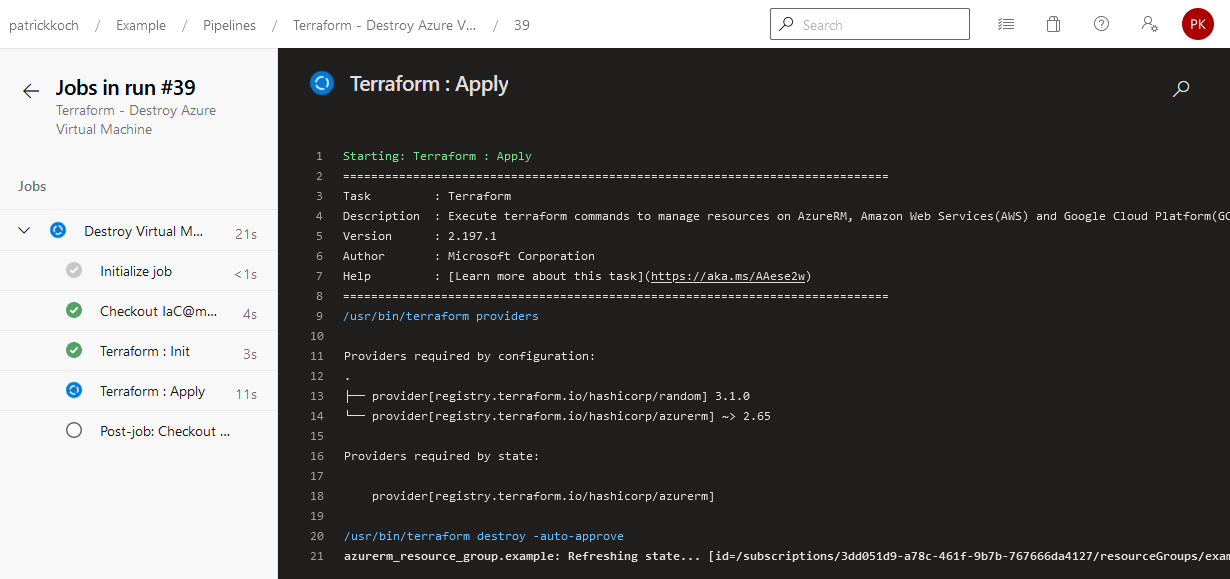
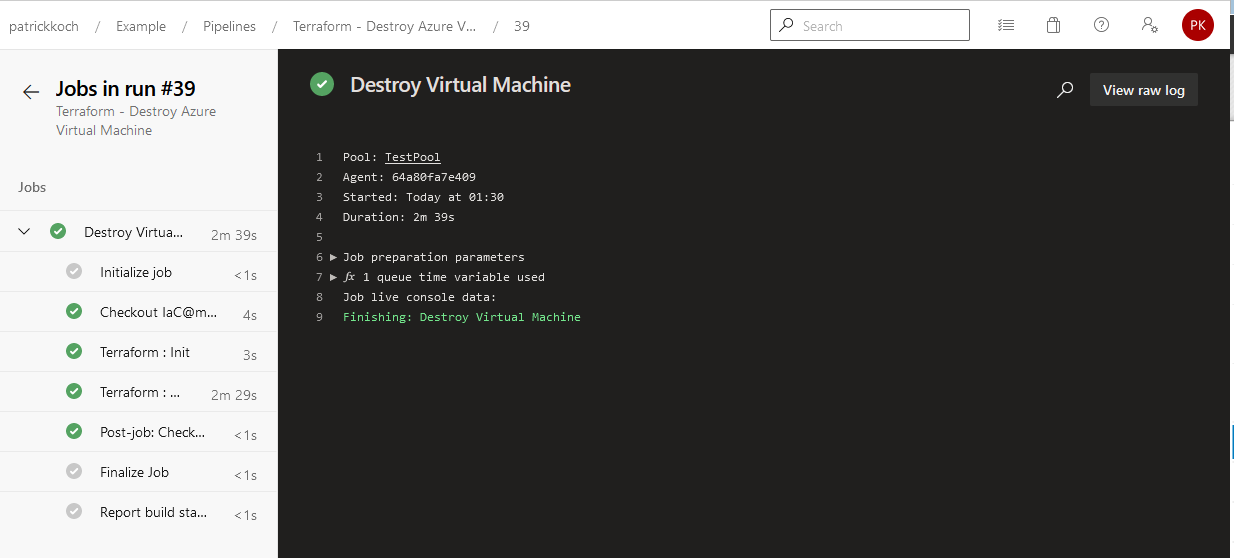
After finishing the job, the virtual machine will be removed from the Azure cloud.
Let’s prove the State File during the destruction process and after finishing the job:
During the destruction process (conducting the Terraform destroy command) - the state is “leased”.

After finishing the job, the stage get’s back to “Available”.

Troubleshooting - Permission for Service Principal
If you’re facing an error message like in the snippet below, then you have to provide your Service Principal dedicated permission for creating cloud resources.
The client '4ff**********************035' with object id '4ff**********************035' does not have authorization to perform action 'Microsoft.Resources/subscriptions/resourcegroups/read' over scope '/subscriptions

5. Conclusion
Integrating the conduction of Terraform commands for provisioning resources in the (Azure) cloud is very efficient. There are three things, which I’d like to highlight:
- Availability of Terraform specific tasks for the pipeline: this really helps a lot if you’re starting with your first pipeline and if you’re not used to the YAML schema definition. By adding the task, it’s straightforward according to the arguments for the task.
-
Creating the Service Connection: I don’t like to create Service Connections, because I’ve always need that much time to get the right data, credentials, etc. - but in that case it was easy: I was linked to a dialogue, at which I could select the desired Azure subscription - after that, the Service Connection was done. That’s great!
-
Usage of Containers for storing the State Files: creating such Container is also simple and easy for usage according to the backend configuration. It’s also a great approach for storing the State Files at a unique spot, which should really be recommended.
So, IMHO Azure DevOps Server harmonises well with Terraform.
References
patrickkoch.dev - Azure - Provisioning a Windows Virtual Machine using Terraform
Microsoft - Azure: Create free Azure account
Microsoft - Azure: Install Azure CLI
Hashicorp - Terraform Recommended Guidelines
GitHub - Azure: Azure CLI List Locations