This post explains how to create a new user in your Azure subscription and how to assign a user to a contributor role using the Azure CLI
Video - Watch the content of the post in my YouTube Video
1. Introduction
This is my very first blog post, which is about the role based access control (RBAC) of Azure. I had to organize an Azure workshop, in which the attendees are allowed to create and access specific resources. Therefore it was necessary for me to create new users for my Azure subscription and to define the proper access control settings.
2. Prerequisites
You should have an Azure subscription to follow the steps in that blog post.
azure.microsoft.com - Create a free Azure account
3. Create a new user
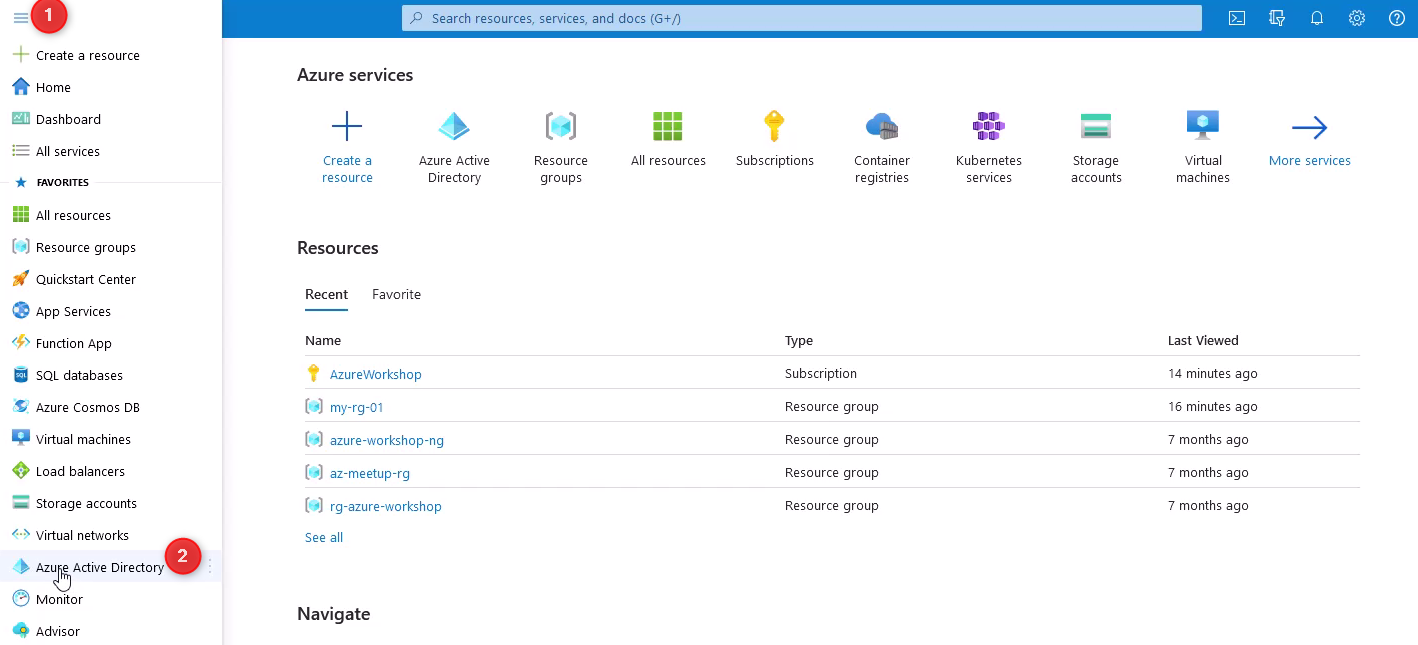
At first, I need to create a new user, who is allowed to login into the Azure Portal. For that, I’ll use the Azure Blade (see 1) on the left and choose “Azure Active Directory” (see 2):
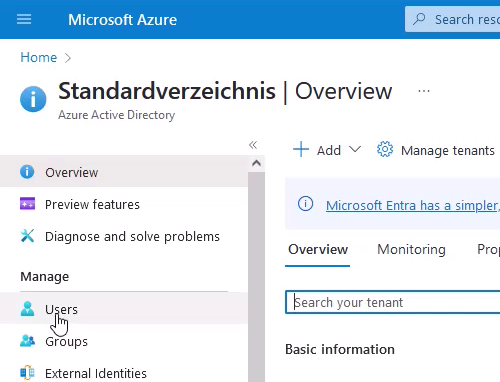
Again on the left I’ll select “Users”…
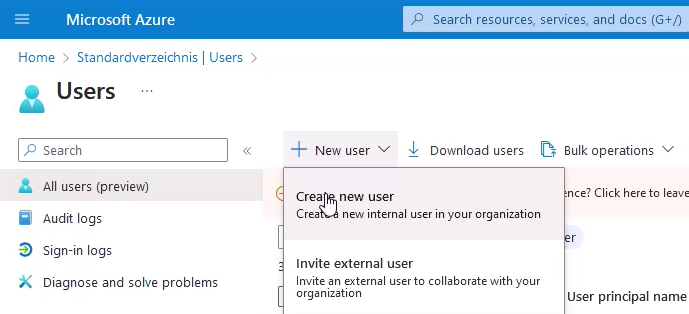
…click on “New user” and choose “Create new user”:
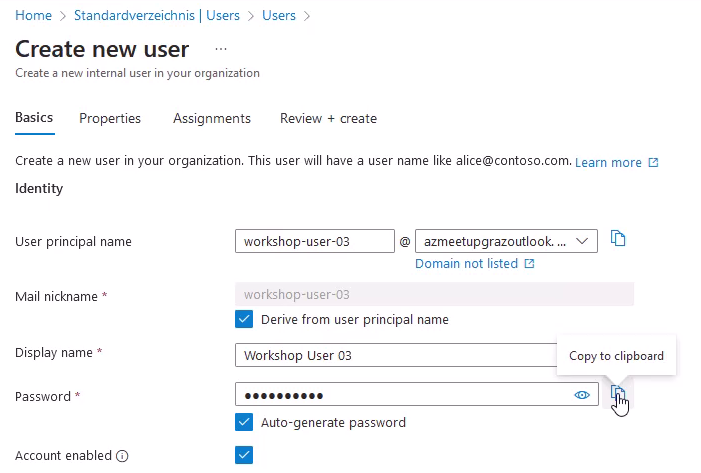
Now it is possible to define the “user principal name”, the “display name”, and the password for the new user, as seen in the picture below:
Finally for creating the user, I’ll confirm it by clicking on the “Review + create” button:

The newly created user should appear after a few seconds:
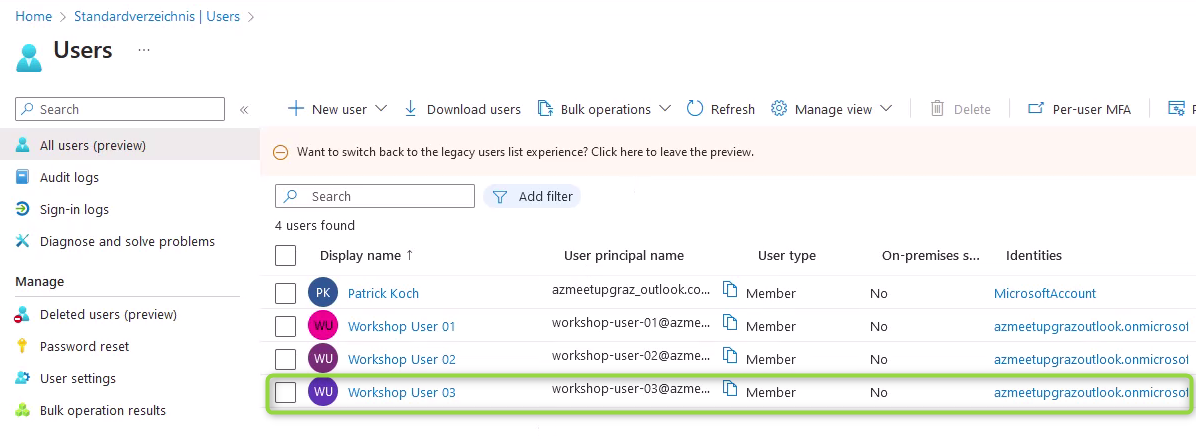
A new user was now created, but currently there a no proper settings made, with regard to the access control. A login with that user in the Azure Portal would not be meaningful.
4. Promote the user to a contributor using the Azure CLI
Let’s add now the “Contributor” role to the newly created user, by using the proper command of the Azure CLI - but restricting this privileged role to a dedicated resource group.
For that, start a new Cloud Shell:
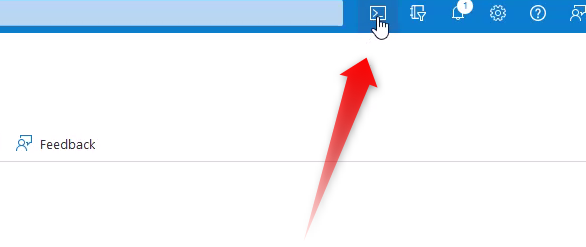
In this example, I’d like to restrict the Contributor role to a dedicated resource group. The name of the resource group should be “my-demo-rg”. This resource group does not exist yet and will be created after entering the following command in the Cloud Shell:
az group create --location westeurope --name my-demo-rg
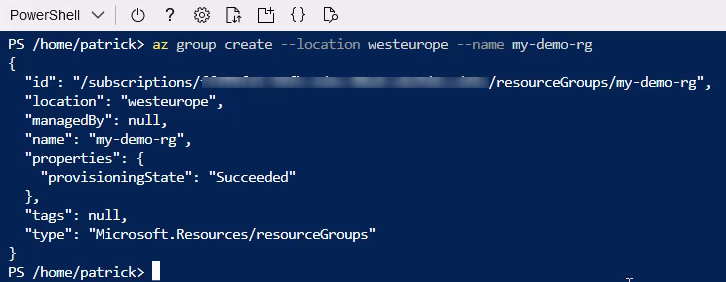
Copy following string from the result after conducting the command - it will be used as an argument for the “-Scope” parameter:

Finally, the newly created user gets the Contributor role assigned. This can be achieved by running following command:
New-AzRoleAssignment -SignInNAme workshop-user-03@<your-domain> -RoleDefinitionName "Contributor" -Scope /subscriptions/<your-subscription-id>/resourceGroups/my-demo-rg -Description 'Contributor role for my-demo-rg resource group'

Now it is possible to log into the Azure Portal using the credentials of the “Workshop User 03” - and in addition, this user is capable of managing resources by using the resource group “my-demo-rg”.
For instance: this user could create an e.g.: Azure Container Instance, using this resource group, for hosting a Container in Azure.
References
azure.microsoft.com - Create free Azure account